Getting Started
Introduction
Thank you for purchasing our theme. We are happy that you are one of our customers and we assure you won't be disappointed. We do our best to produce top notch themes with great functionality, premium designs and human readable code.
RightWay is a responsive and clean HTML template, made by a team of creative professionals here in ThemeRex. ThemeRex is a place to buy premium WordPress themes and HTML templates covered by effective and helpful support. Creative, crazy about details and innovative. We are a small and customers oriented company aiming to exceed your expectations!
Rate This Theme
DON'T FORGET to rate this theme on ThemeForest – it's good to know what others think about our work. You can rate it in the download area of your account:
How To Use This Document
Before you get started we highly encourage you to get familiar with this documentation file. Spending half an hour reading the manual may save a lot of your time and avoid questions with obvious answers.
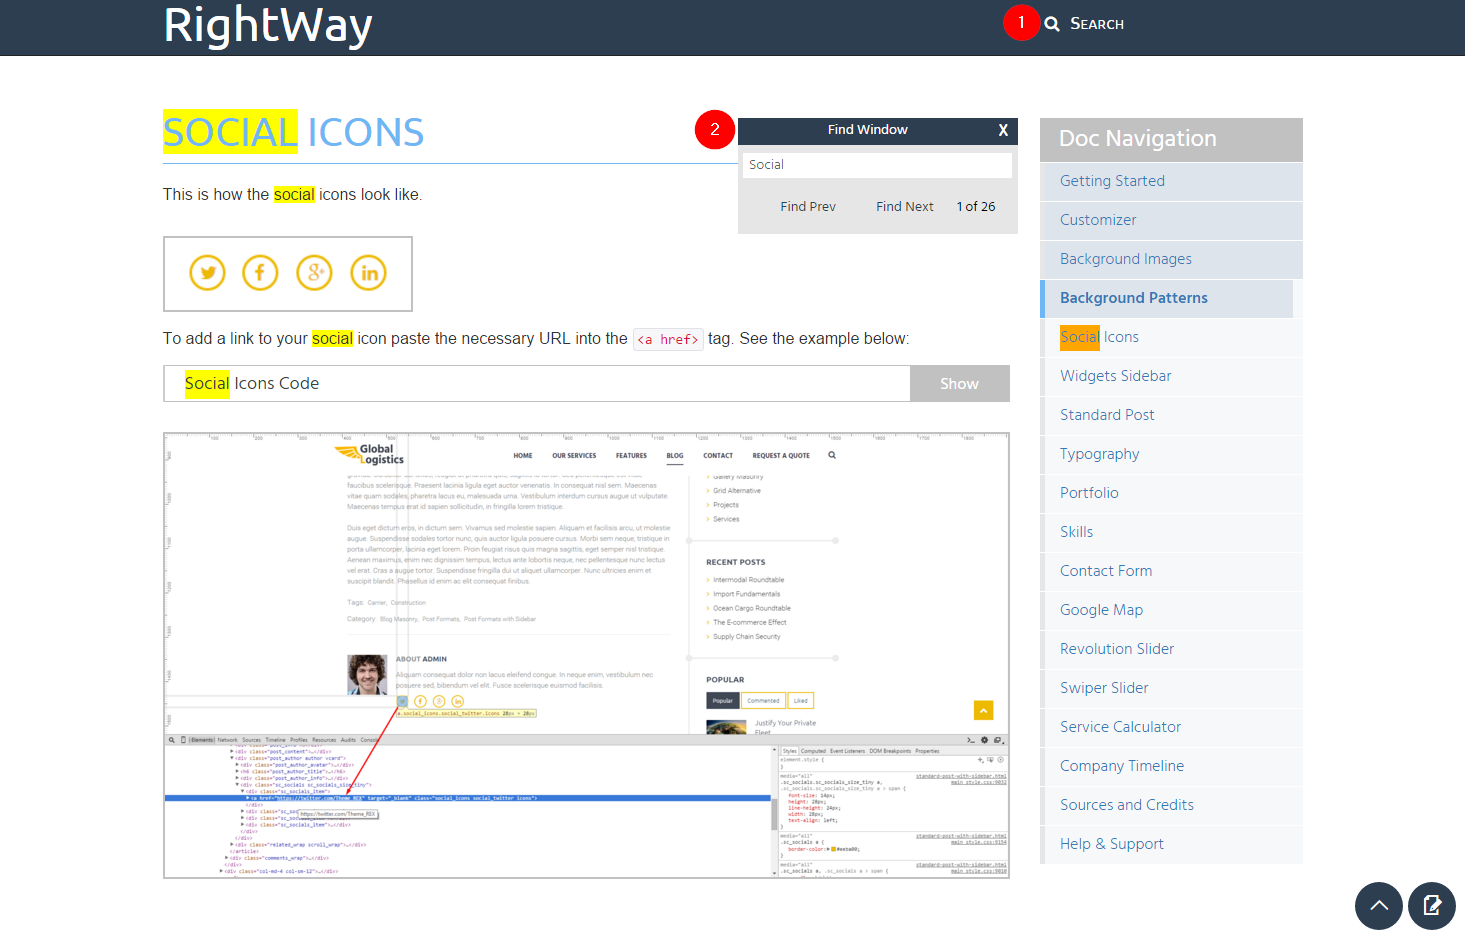
Use our built-in Search tool (top right corner in the header of this file) or the search tool in your browser (click CTRL+F - works in most browsers) to quickly find all the keywords which you are looking for:
License
With ThemeForest regular license you are licensed to use this theme to create one single End Product (the final website customized with your content) for yourself or for one client. In short:
What is allowed with single regular license:
- You can create one website for yourself or for your client and you can transfer that single website to your client for any fee. This license is then transferred to your client.
- You can install the theme on your test server for testing/development purposes (that installation shouldn't be available to the public).
- You can modify or manipulate the theme, you can combine it with other works to create the End Product.
- Theme updates for that single End Product (website) are free.
What is not allowed:
- With single regular license it is not allowed to create multiple websites. For multiple websites you will need multiple regular licenses.
- To resell the same website (Single End Product) to another clients. You will need to purchase an extended license for this.
- License FAQ: http://themeforest.net/licenses/faq
- Licenses overview: http://themeforest.net/licenses
- Regular license details: http://themeforest.net/licenses/regular
- Extended license details: http://themeforest.net/licenses/extended
Help & Support
Support Policy
Please read this user guide carefully, it will help you eliminate most of potential issues with incorrect configuration or using of this template.
IMPORTANT! Please note that as authors of this template we are able to provide support only for the features which we created and for the issues related strictly to this template. We do not provide support for configuration, installation, maintenance, customization, any kind of 3rd party plugins etc.
If you have any questions that are beyond the scope of this help file, feel free to post them on our support message board at https://themerex.ticksy.com/.
We will respond as soon as possible (within 24 – 48 hours, usually faster). Please make sure you take a look at the available resources before submitting a support request.
Customization
As we have mentioned above customization/modification is beyond the scope of our support. Nevertheless, if you in need of such services you can always stick with our partners from MockingBird Customization Studio. They provide all kinds of services from template/theme installation to deep coding customizations.
All you need to do is follow this link https://mockingbird.ticksy.com/ and submit a ticket with detailed explanations of what needs to be done.
As for the minor CSS tweaks the best way is to use Firebug (an add-on for Firefox: http://getfirebug.com/), Chrome Developer Tools (available in Google Chrome) or other similar tools.
See these short video tutorials about Firebug:
- http://getfirebug.com/video/Intro2FB.htm
- https://css-tricks.com/video-screencasts/15-introduction-to-firebug/

Here you can find more information about CSS:
Customizer
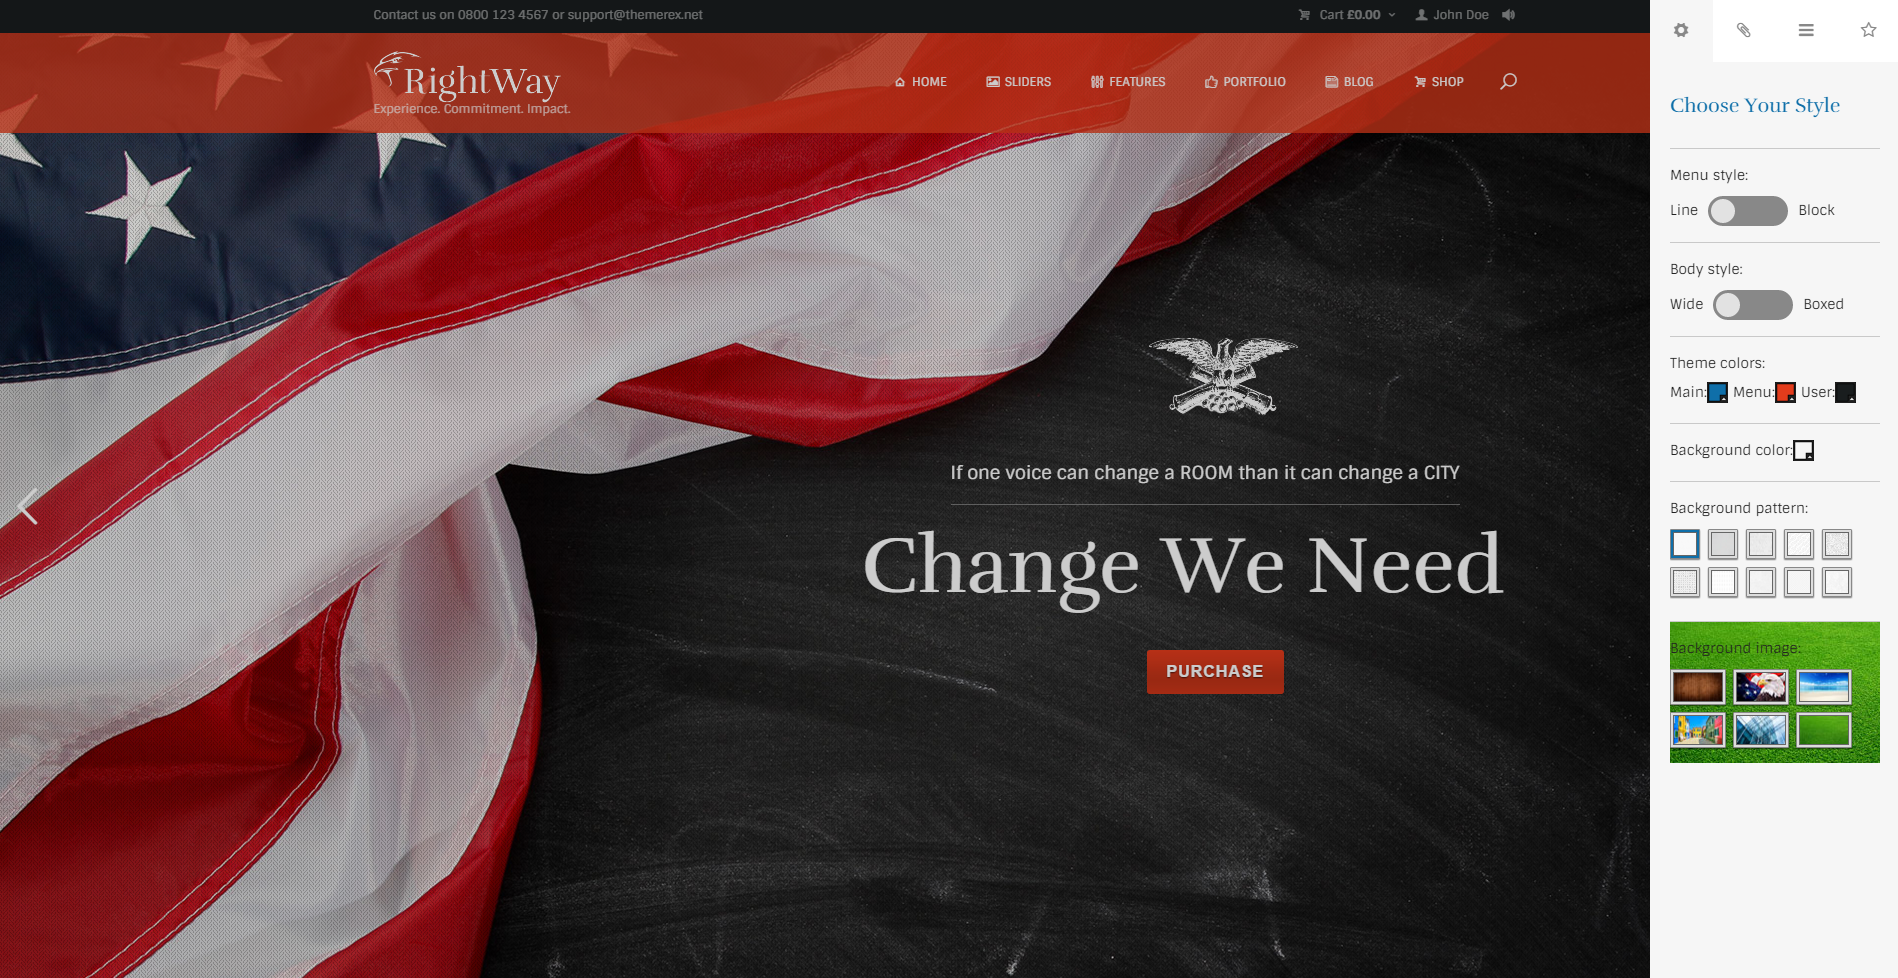
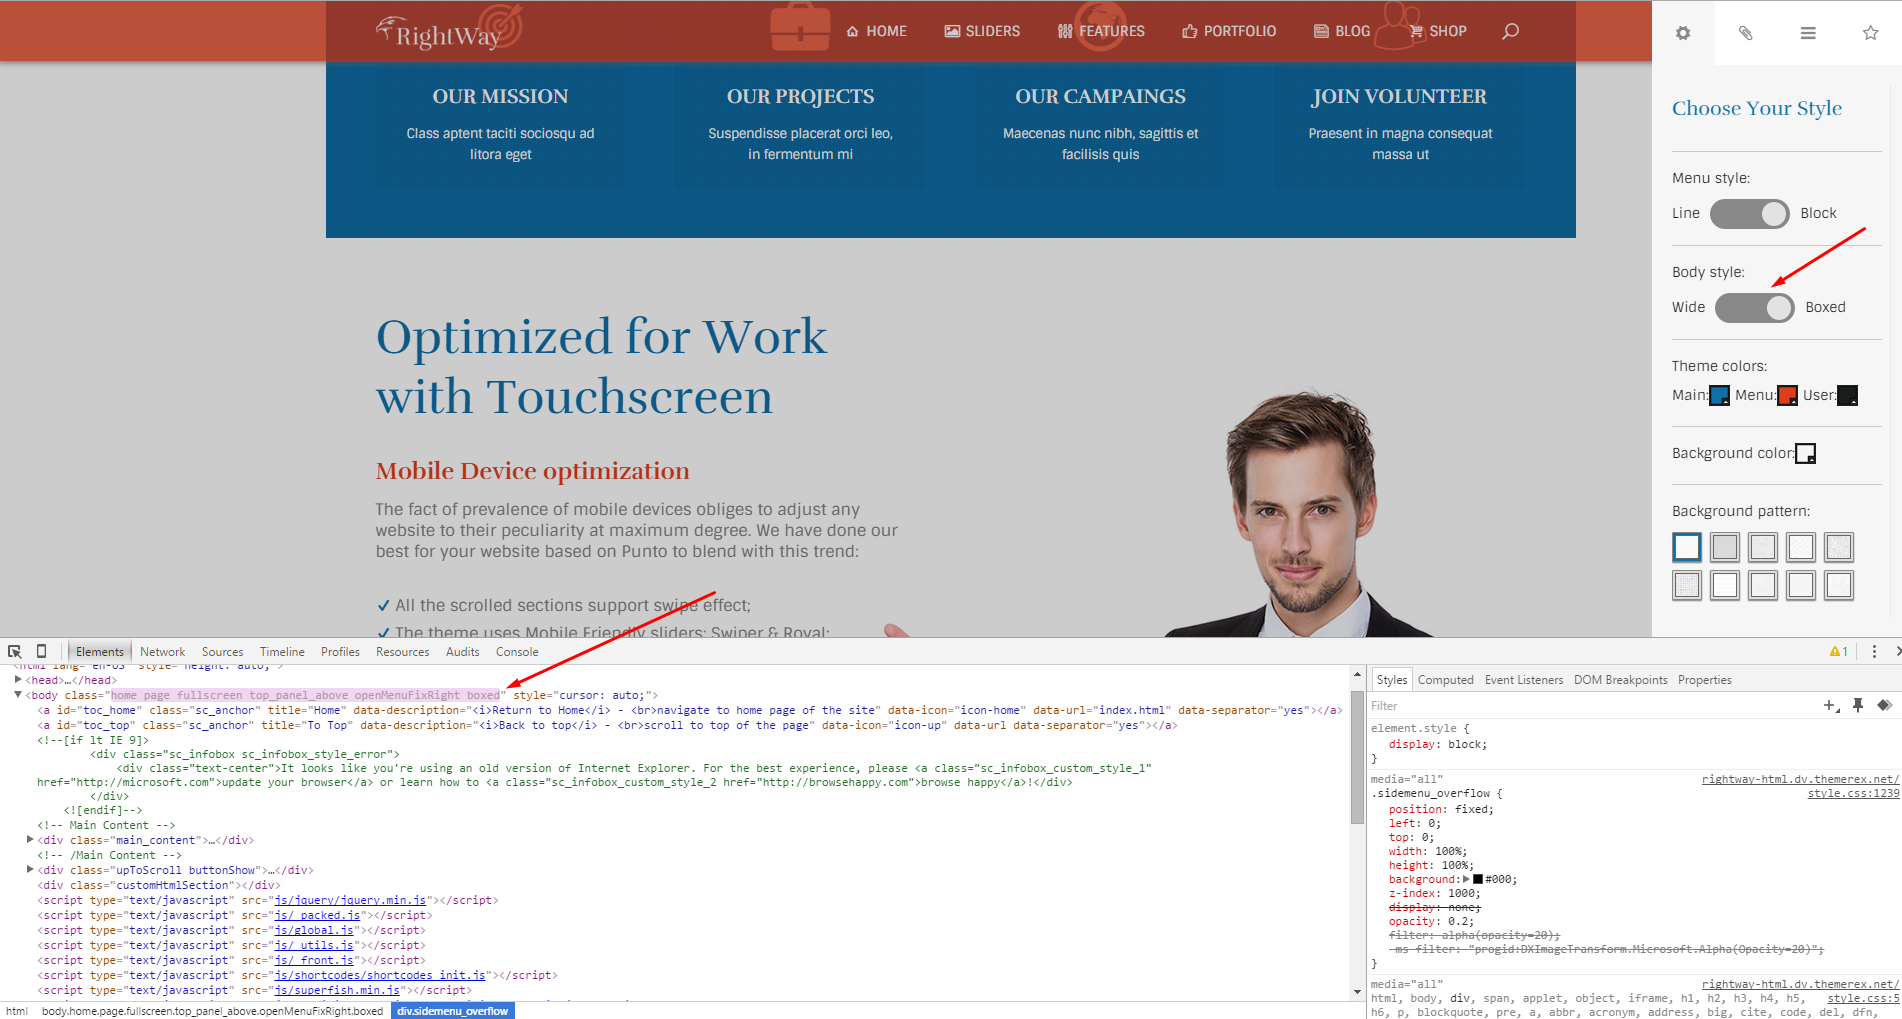
Components
On the the screenshot below you can see how the Customizer panel looks like.
Files responsible for the output, styles and settings of the panel can be found here:
root directory.../js/_customizer.js
root directory.../css/style.css
To turn the panel on/off you need to comment/uncomment the following line in your index.html file:
<script type="text/javascript" src="js/_customizer.js"></script>
PLEASE NOTE! Changes made via Customizer panel will be active until you refresh the page. To save the changes you'd need to edit the source files. Such "on-the-go" customization functionality was made for a demonstration purposes only.
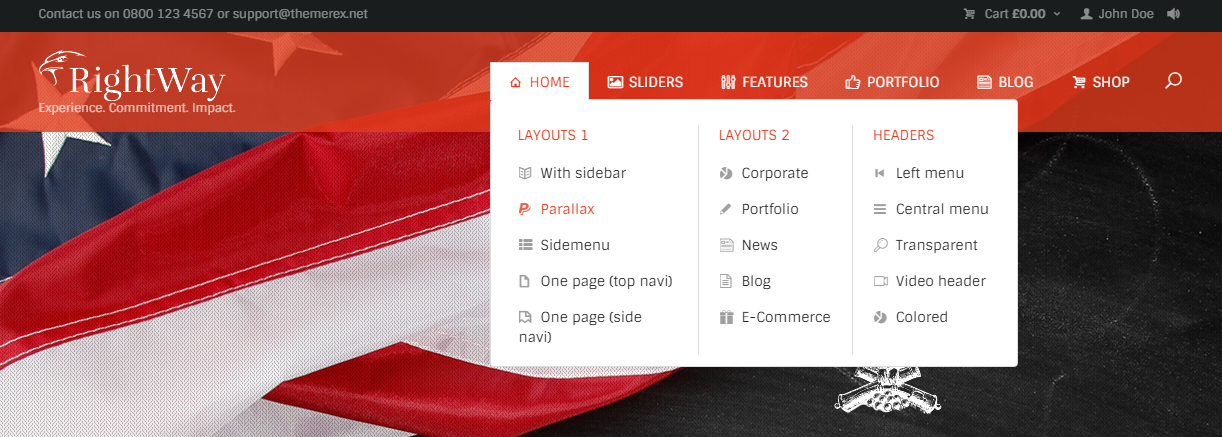
Menu Styles
There are 2 menu styles available in this template:
Line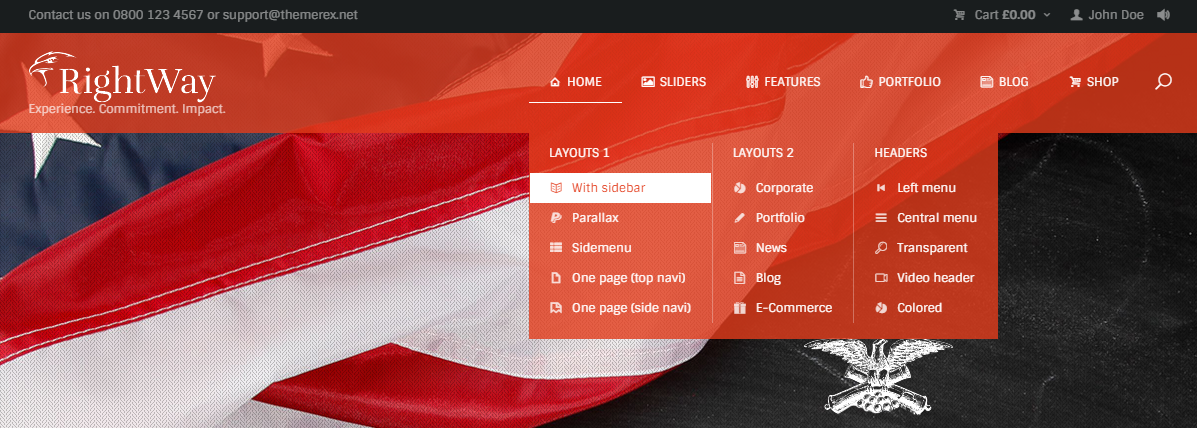
Check the _customizer.js file for more information.
// Body and Main menu style
jQuery("#custom_options .switcher a,#custom_options .switcher2 a" ).draggable({
	axis: 'x',
	containment: 'parent',
	stop: function() {
		var left = parseInt(jQuery(this).css('left'), 10);
		var curStyle = left < 25 ? (jQuery(this).parent().hasClass('switcher') ? 'wide' : 'line') : (jQuery(this).parent().hasClass('switcher') ? 'boxed' : 'fon');
		switchBox(jQuery(this).parent(), curStyle, true);
	}
});
jQuery("#custom_options .switcher, #custom_options .switcher2" ).click(function(e) {
	"use strict";
	switchBox(jQuery(this));
	e.preventDefault();
	return false;
});
jQuery("#custom_options .co_switch_box .co_switch_label").click(function(e) {
	"use strict";
	var state = jQuery(this).hasClass('boxed') ? 'boxed' : (jQuery(this).hasClass('wide') ? 'wide' : (jQuery(this).hasClass('line') ? 'line' : 'fon'));
	switchBox(jQuery(this).siblings('div'), state);
	e.preventDefault();
	return false;
});
Body Styles
There are 2 body styles also: Wide and Block.
Check the <body class="home page fullscreen top_panel_above openMenuFixRight boxed" style="cursor: auto;"> line on the screenshot below.
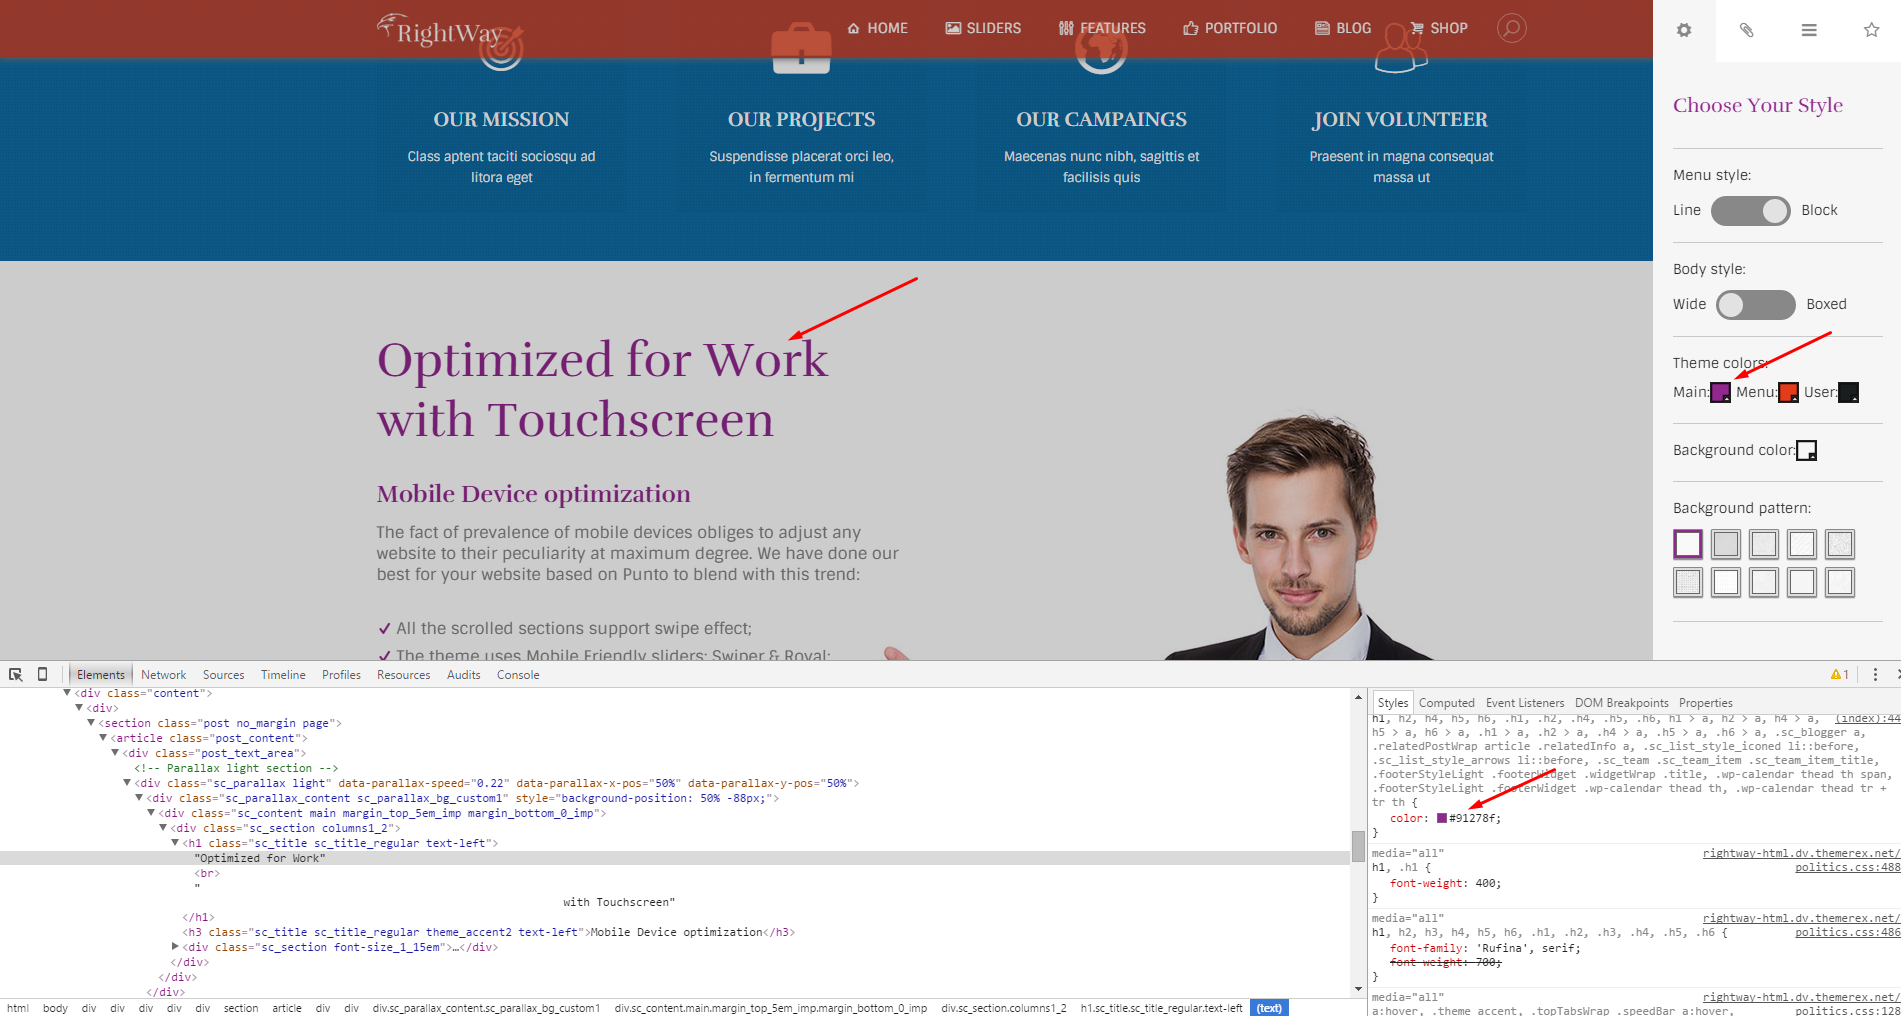
Theme Colors
Here you can choose any custom color to act as theme's Main/Menu/User one.
Background Color
This option is responsible for setting custom background color.

Background Pattern
You can also apply one of the available patterns to your background.
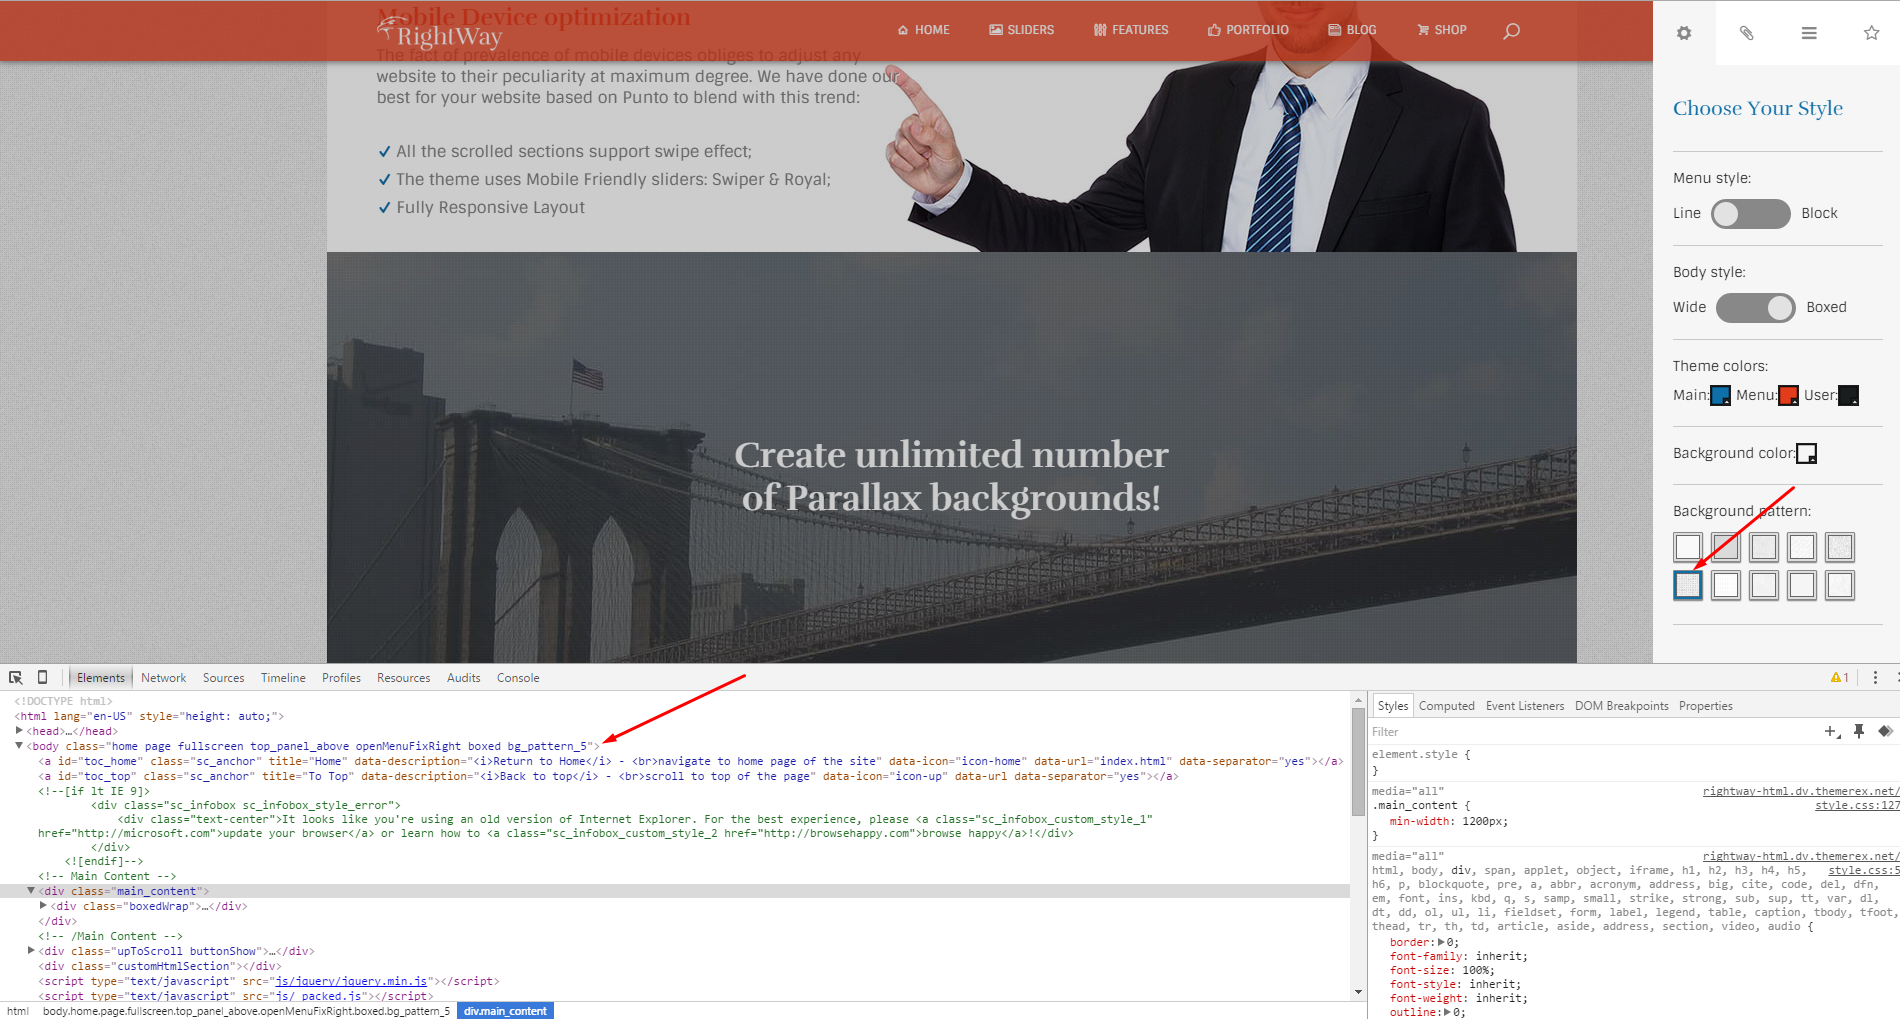
To change a background pattern add of one the classes below into the <body> tag:
<body class="home page fullscreen top_panel_above openMenuFixRight boxed bg_pattern_5">
Background Image
This option allows you to set one of the available images to act as your background image.
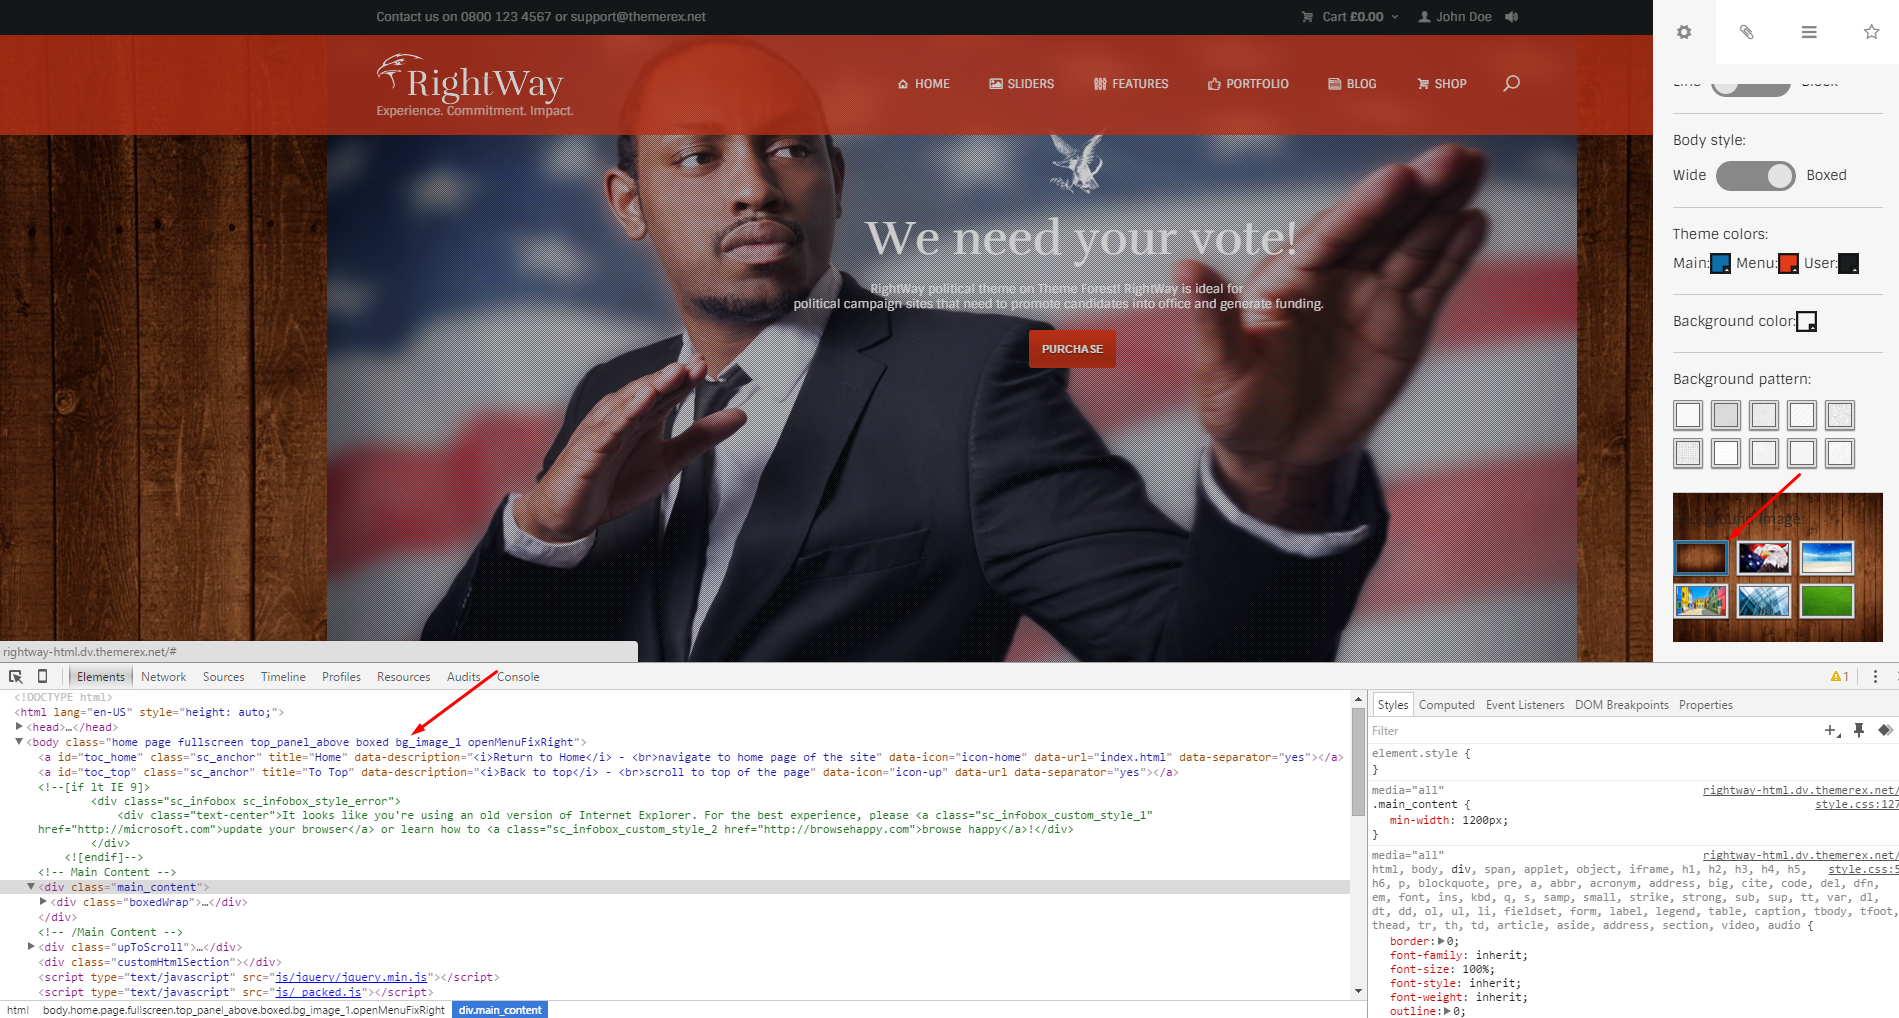
To change the background image add one of the classes below into the <body> tag:
<body class="home page fullscreen top_panel_above boxed bg_image_1 openMenuFixRight">
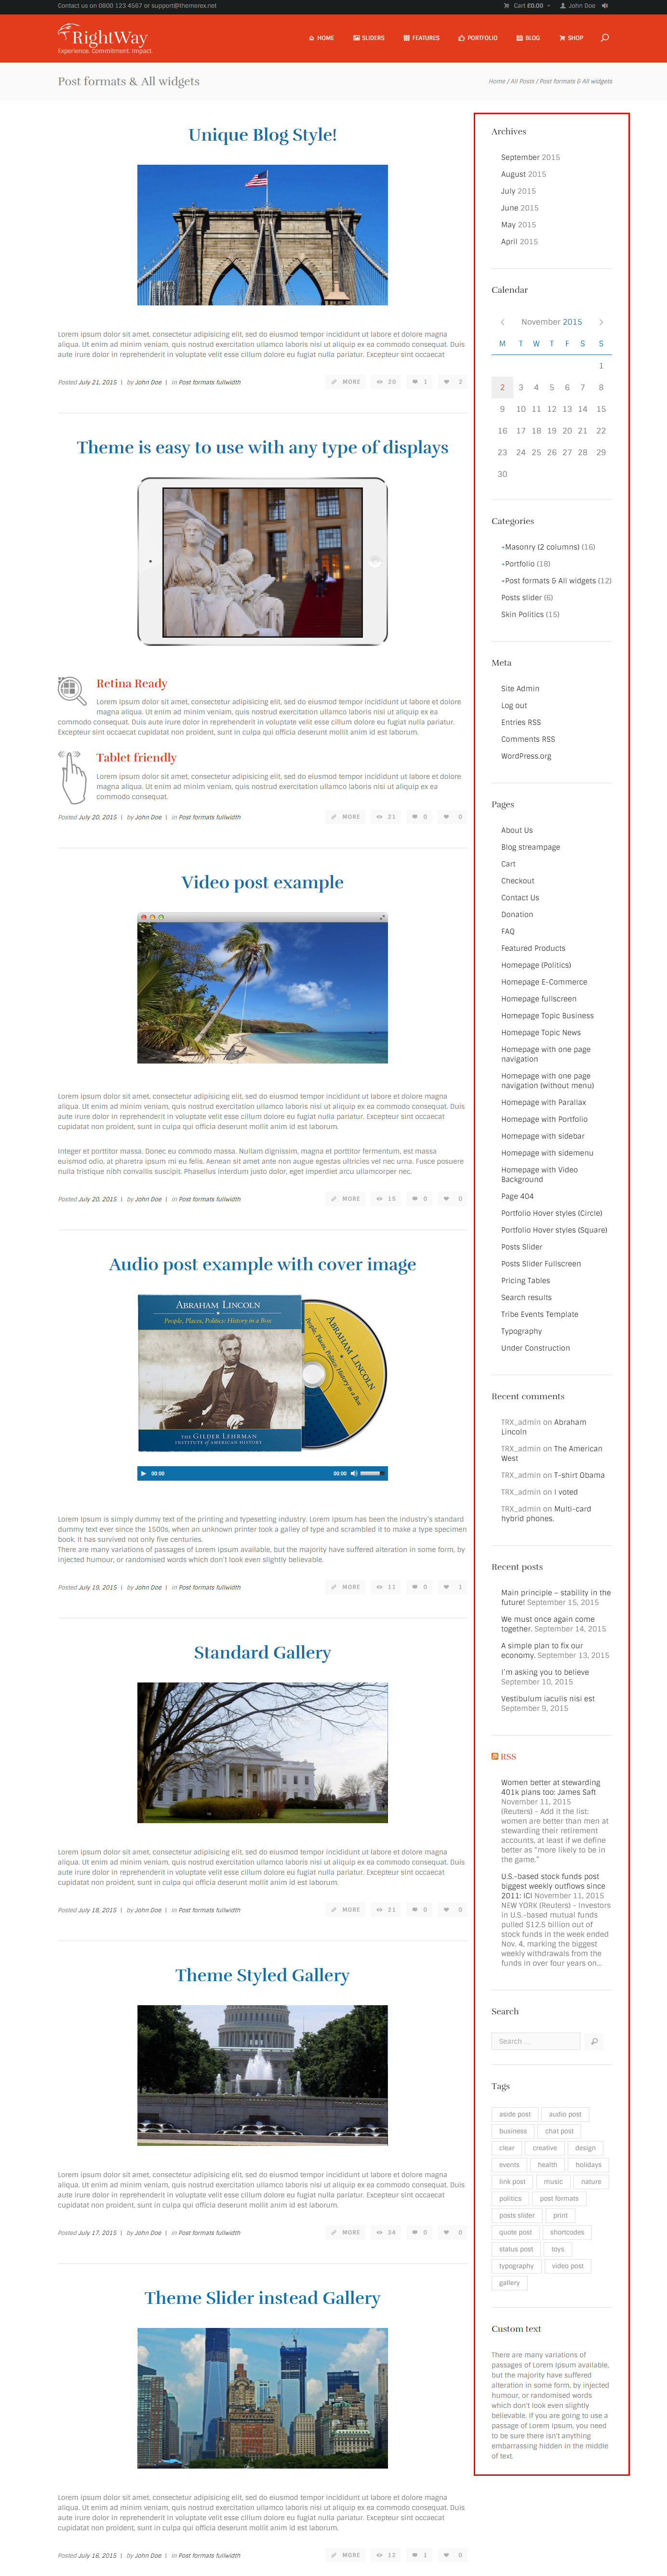
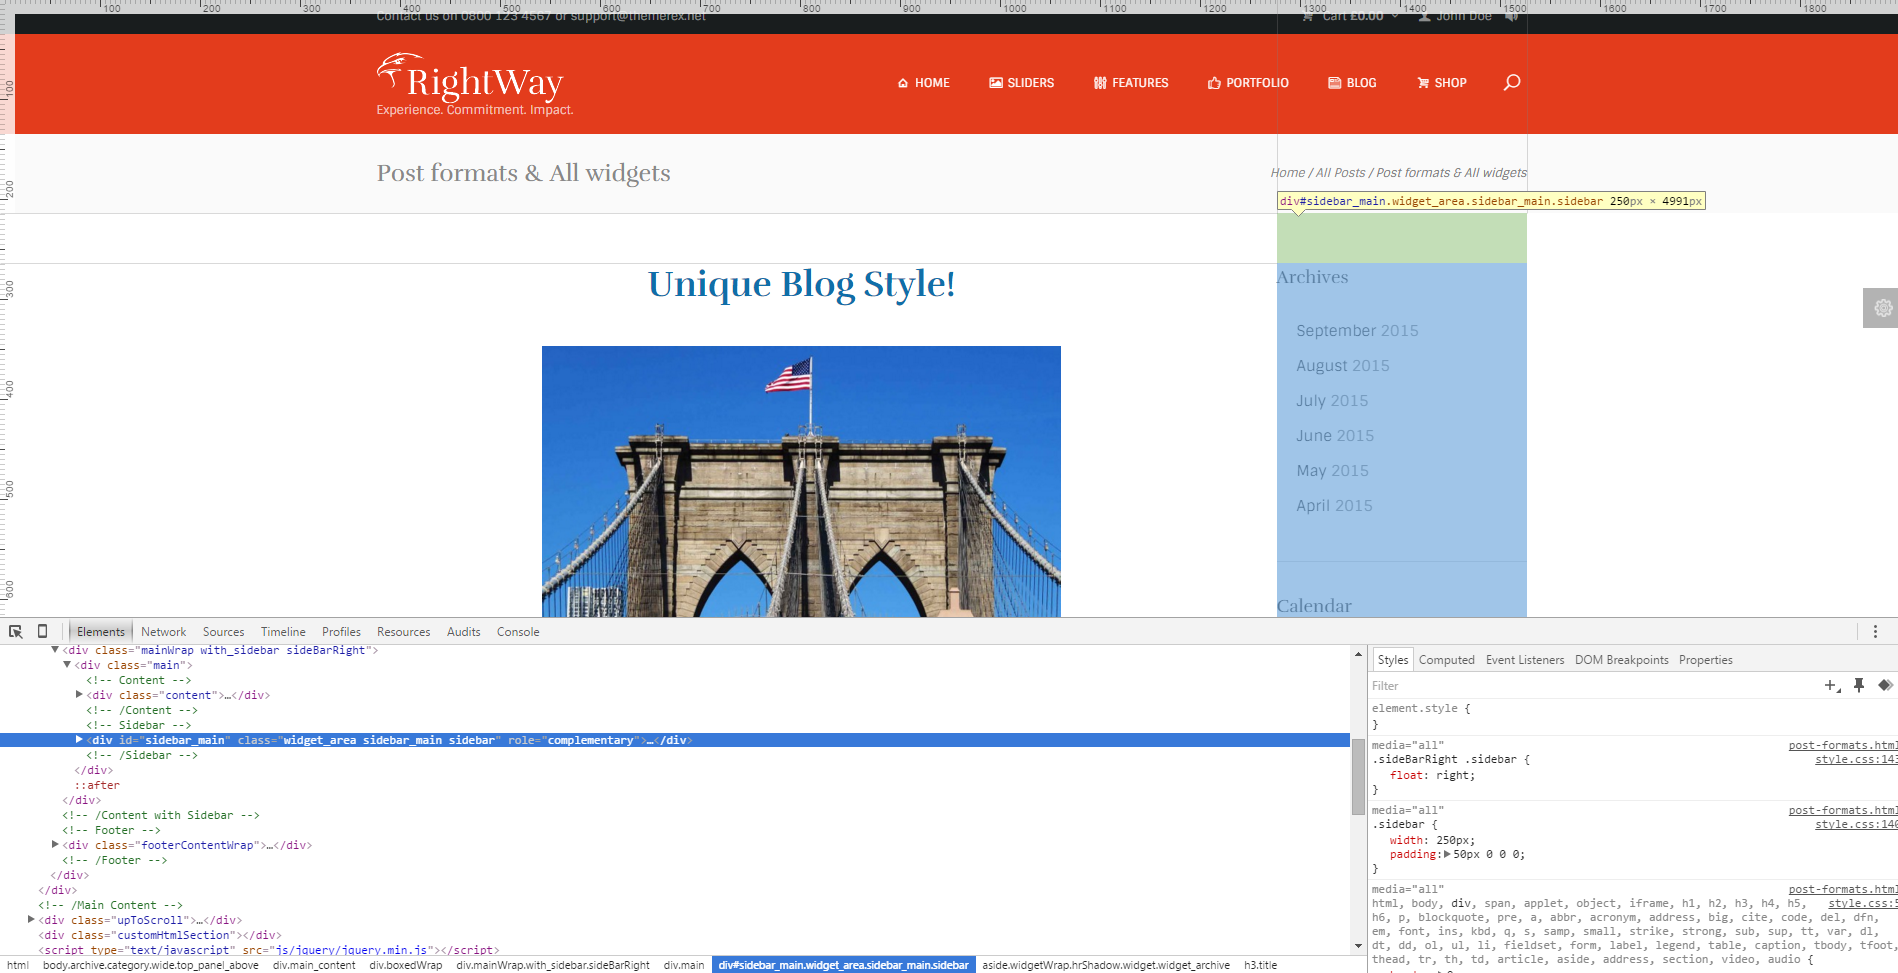
Widgets Sidebar
This is how the standard widgets sidebar looks like.
<div id="sidebar_main" class="widget_area sidebar_main sidebar" role="complementary">
...
</div>
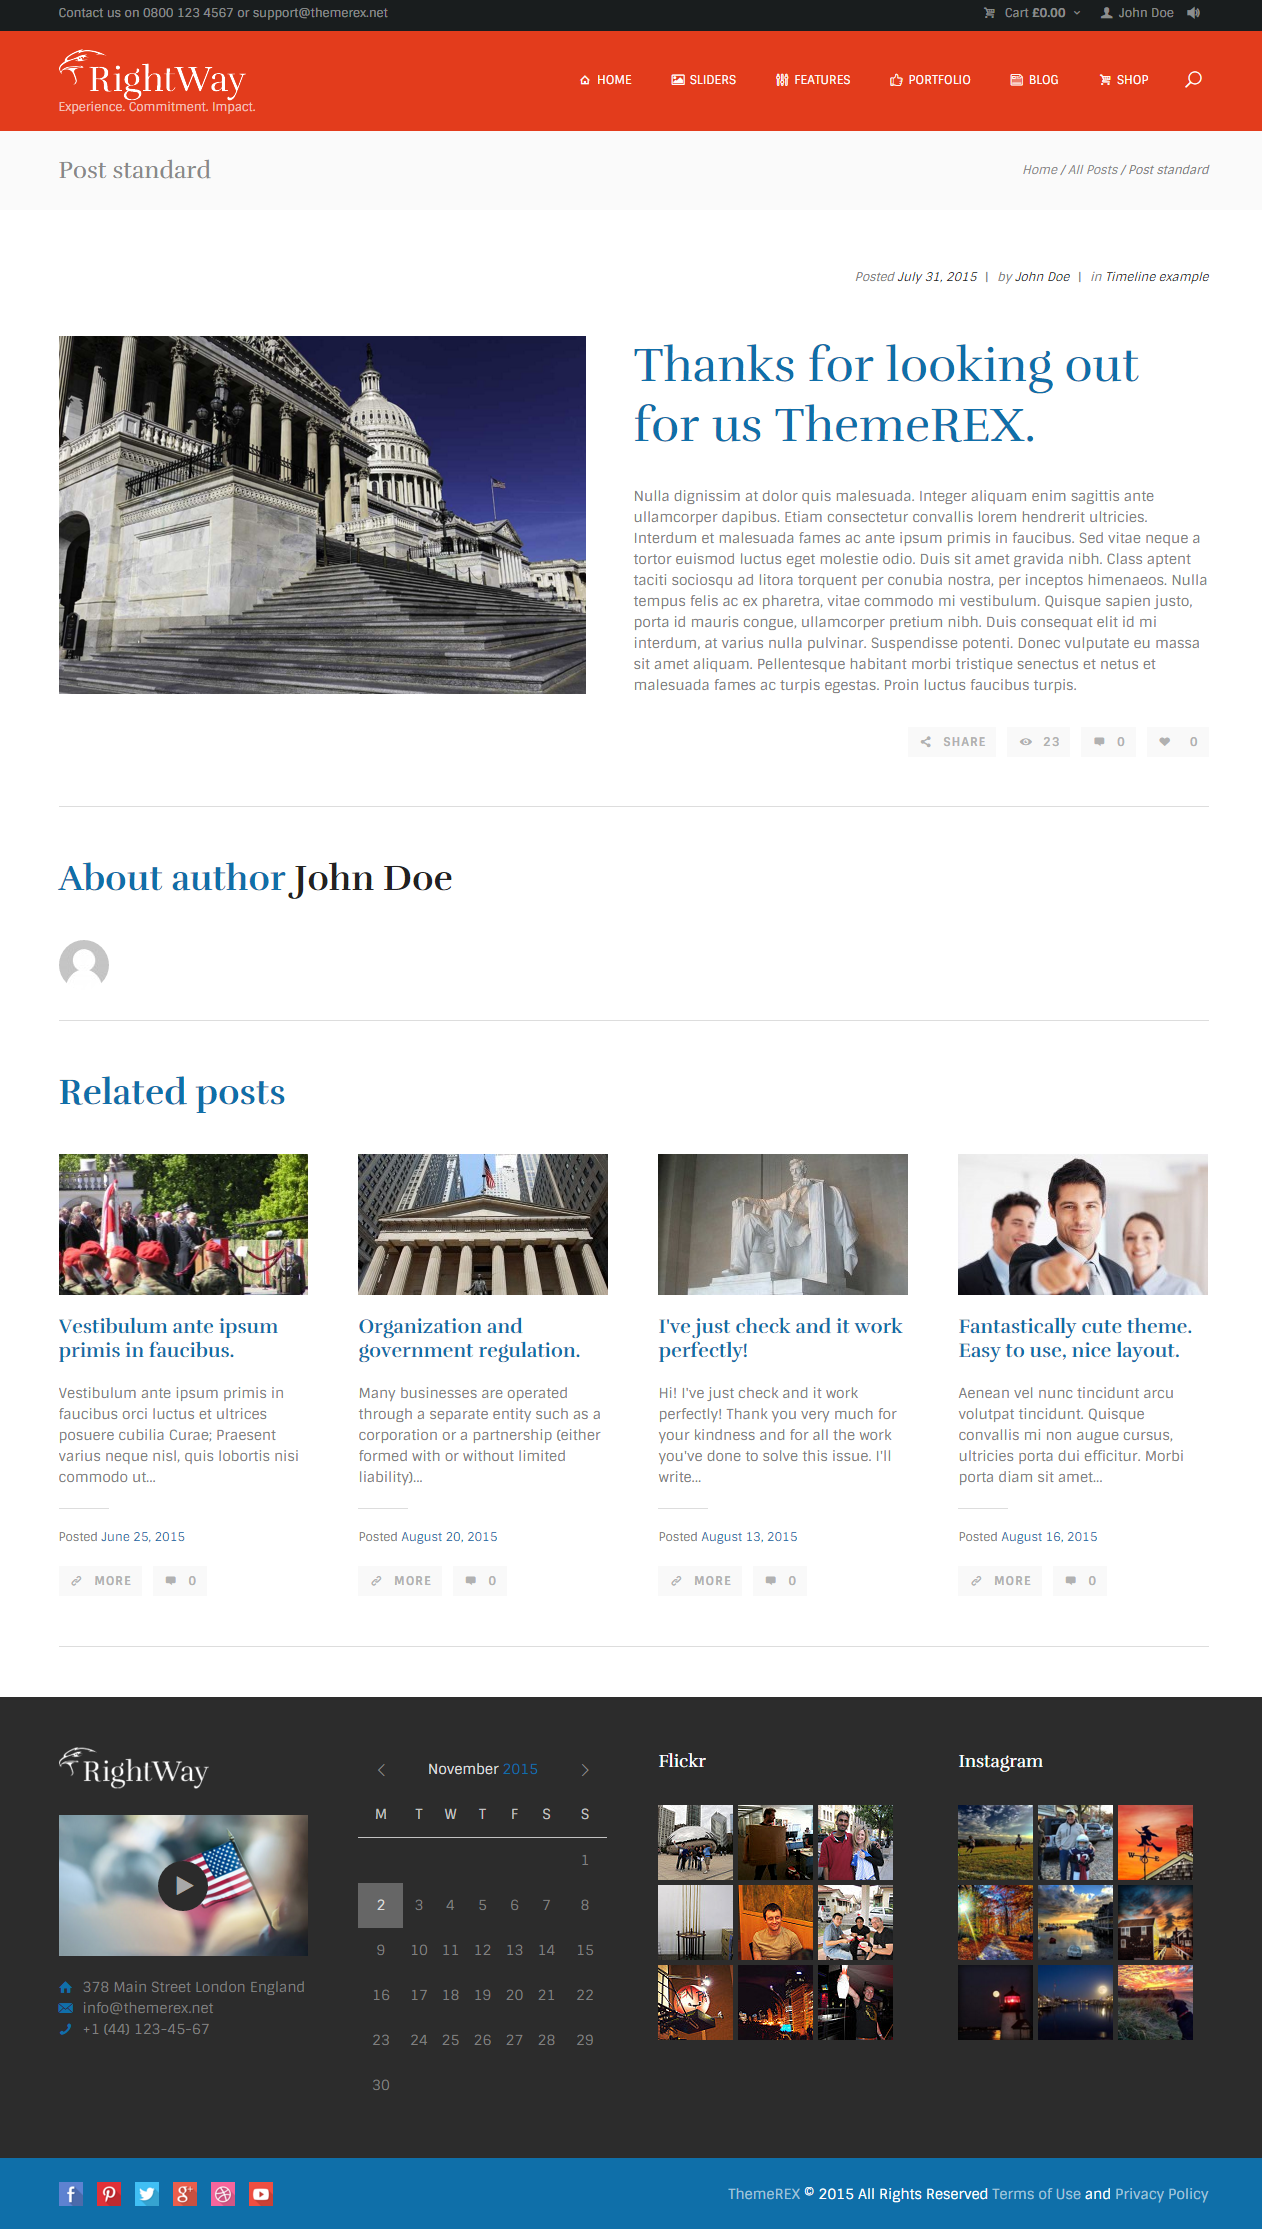
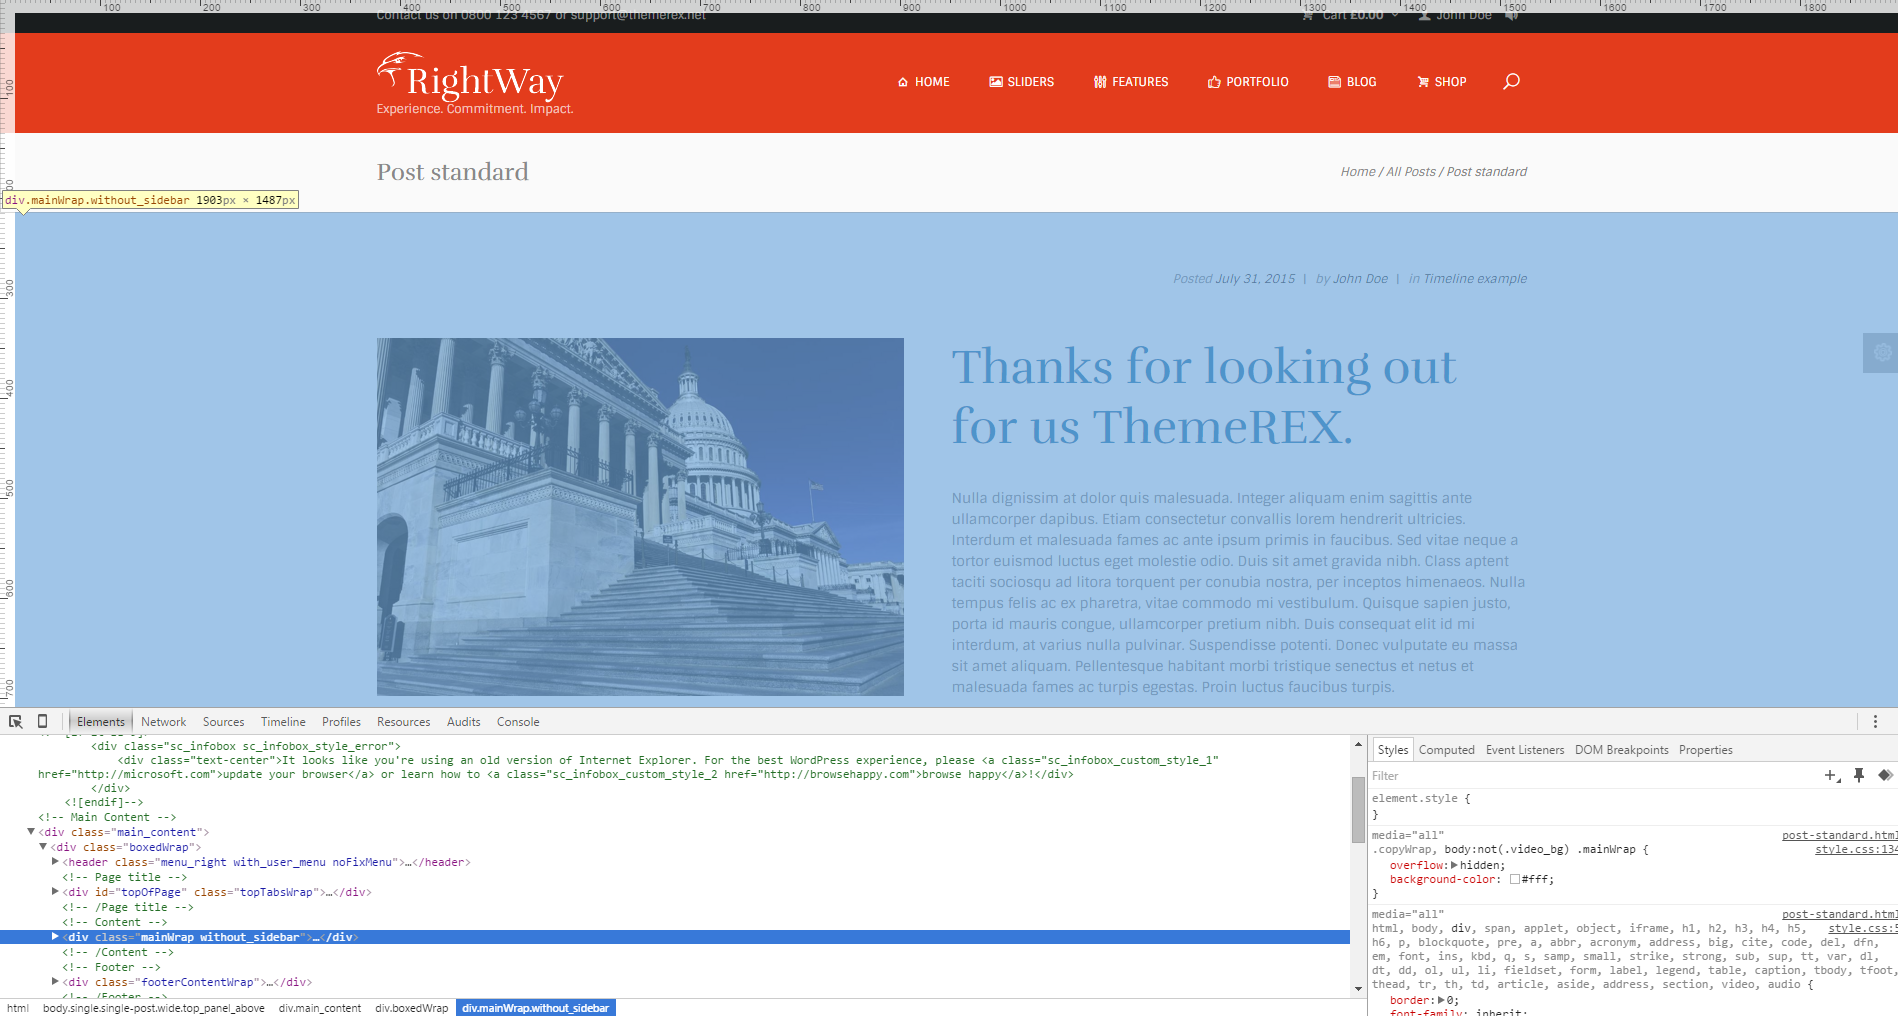
Standard Post
Below is an example of a Standard Post.
<div class="mainWrap without_sidebar">
...
</div>
Portfolio
The example of portfolio-like page can be seen on "Grid (2 Columns)" page.
Please note that animation effects are made with Isotope script. See the screenshots below for more information.
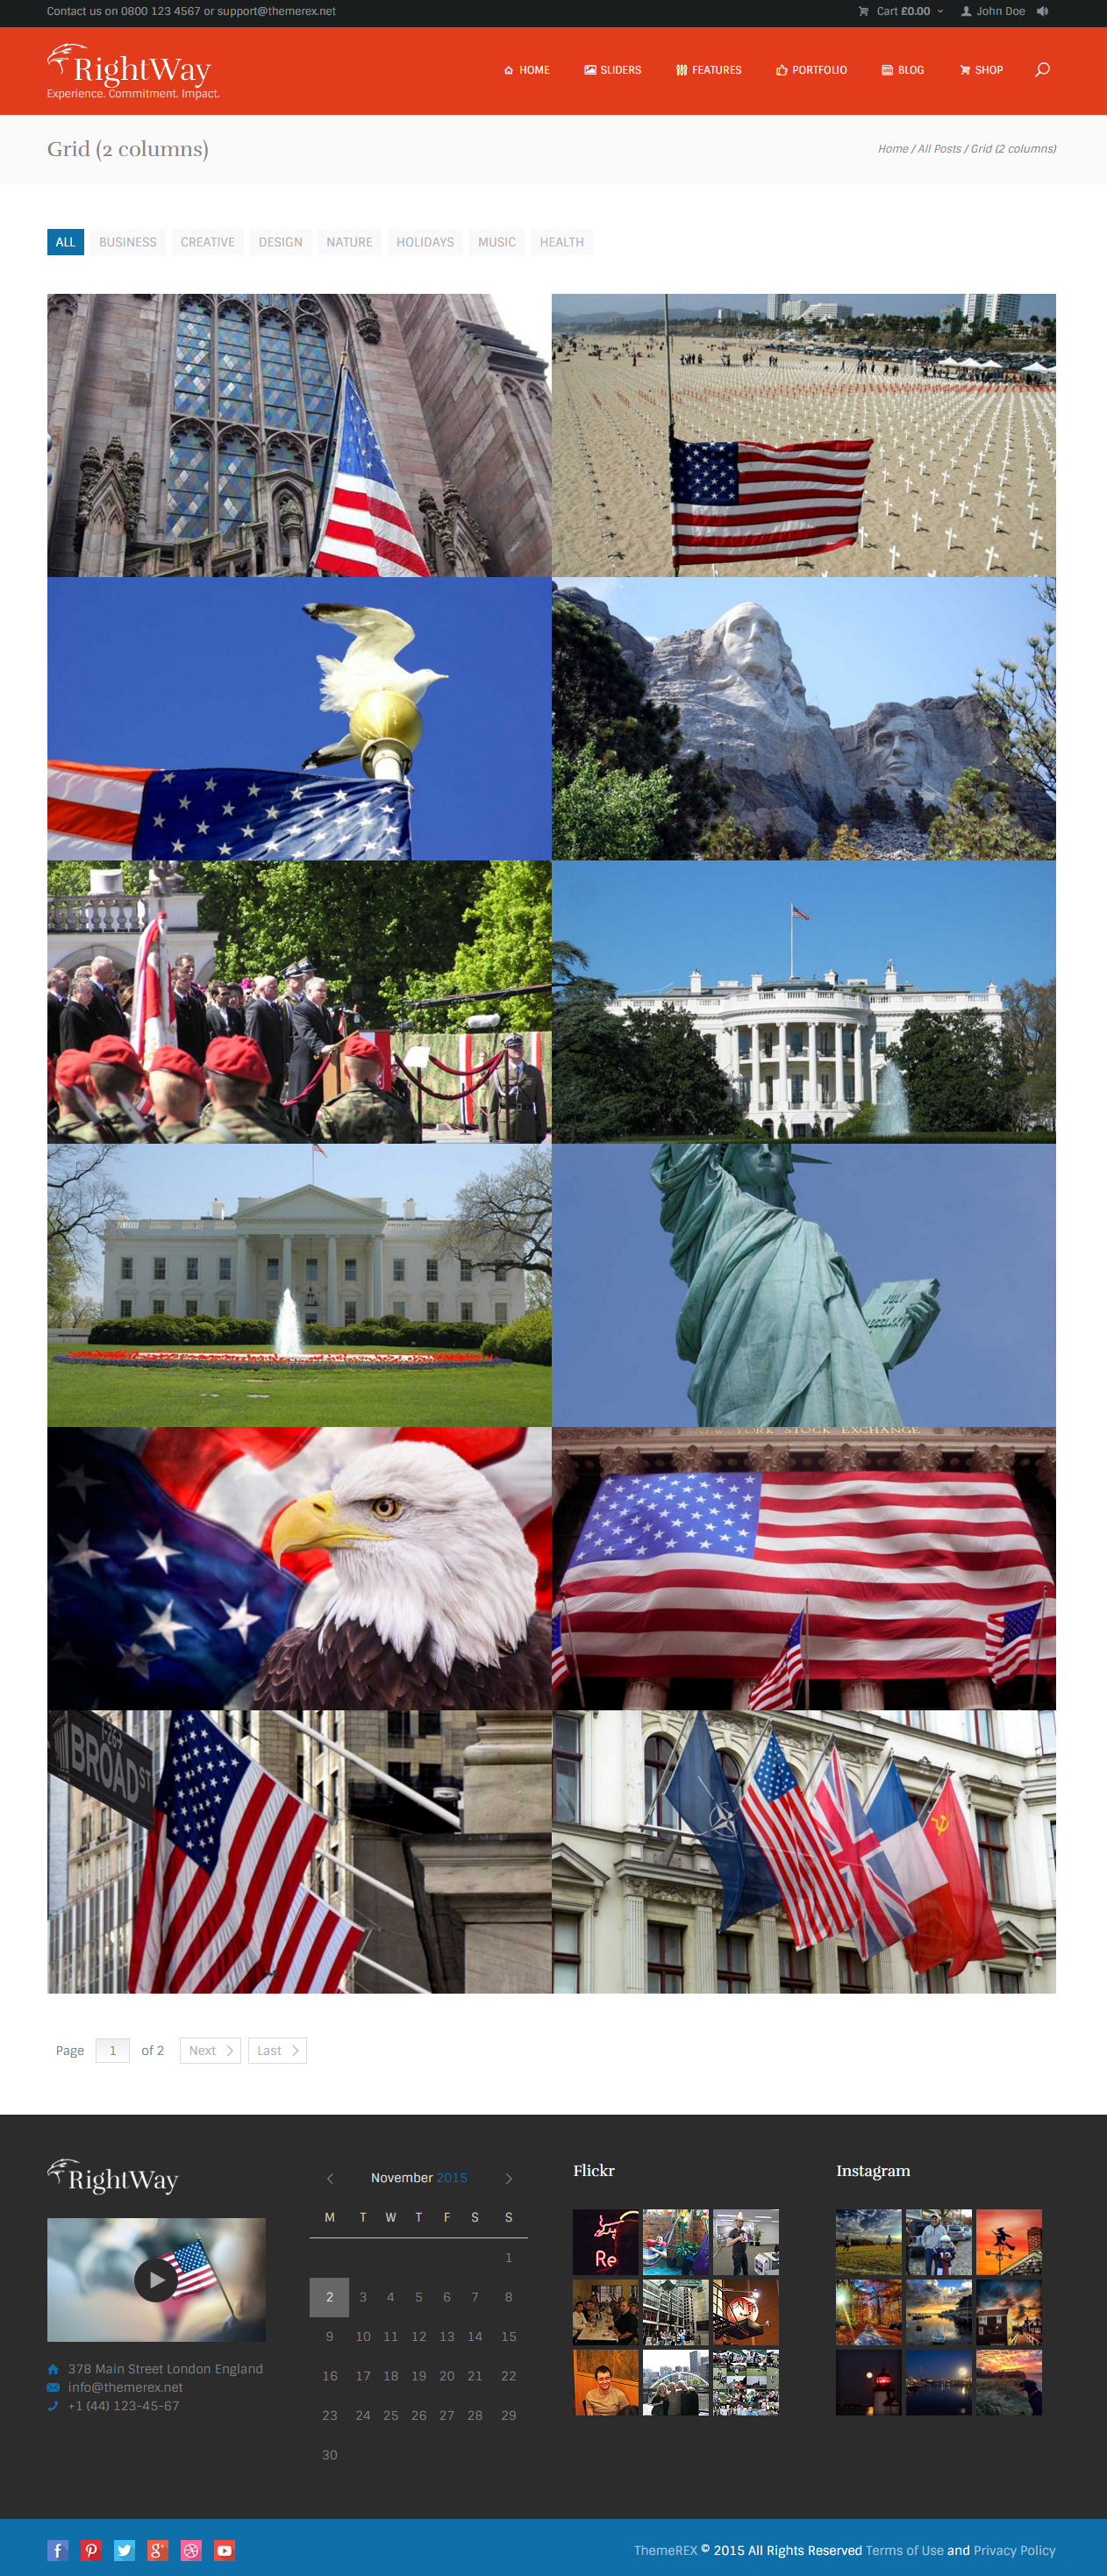
The snippet below belongs to the "Grid (2 Columns)" page which can be found in root directory.../grid-2-columns.html file.
<div class="portfolioWrap">
...
</div>
Isotope Class.

Special Isotope filtering classes.
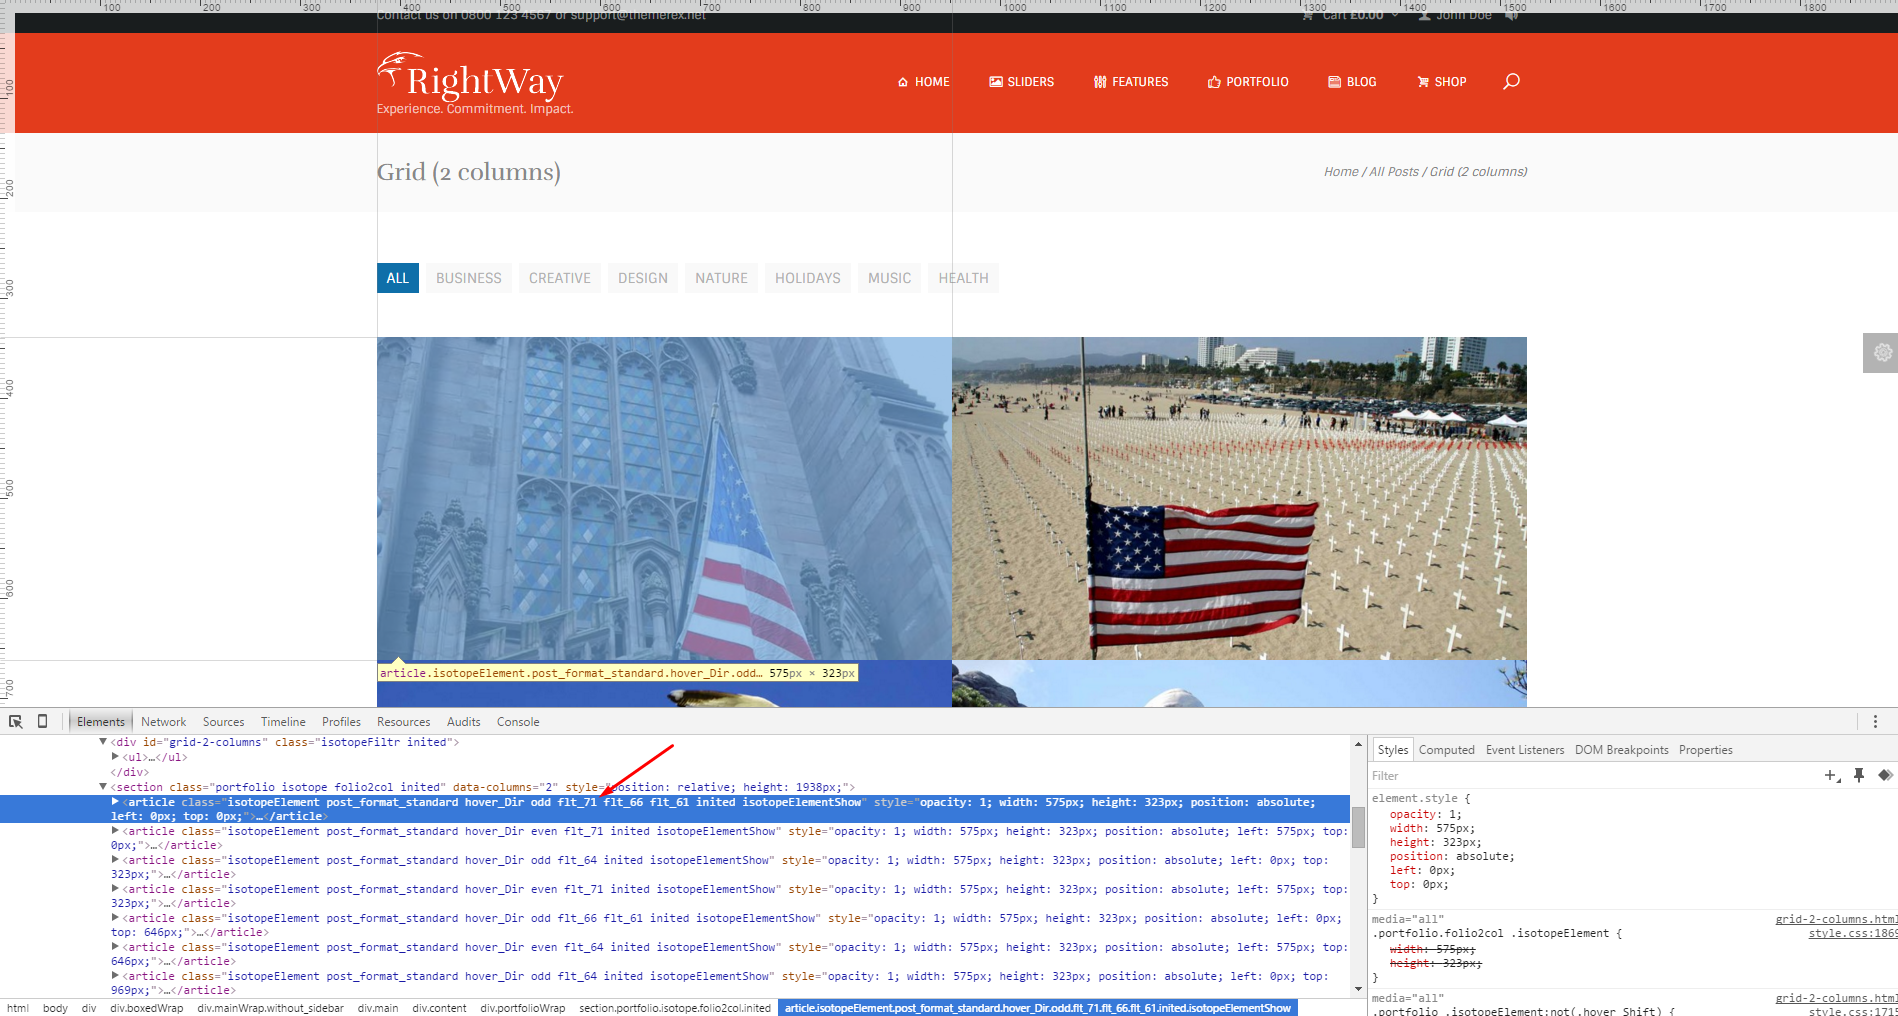
Please note that filtration in portfolio block works only if an element contains filtering class, for example "flt_71".
Files responsible for the Isotope script can be found in root directory.../js/isotope/... folder.
Social Icons
This is how the social icons look like.

To add a link to your social icon paste the necessary URL into the <a href> tag. See the example below:
<a class="social_icons fShare facebook_custom_bg" href="http://facebook.com" target="_blank" title="Facebook">
	<span class="facebook_custom_bg"></span>
</a>

Typography
Below you can find some of the Typography elements used in this template.
Headings

Columns
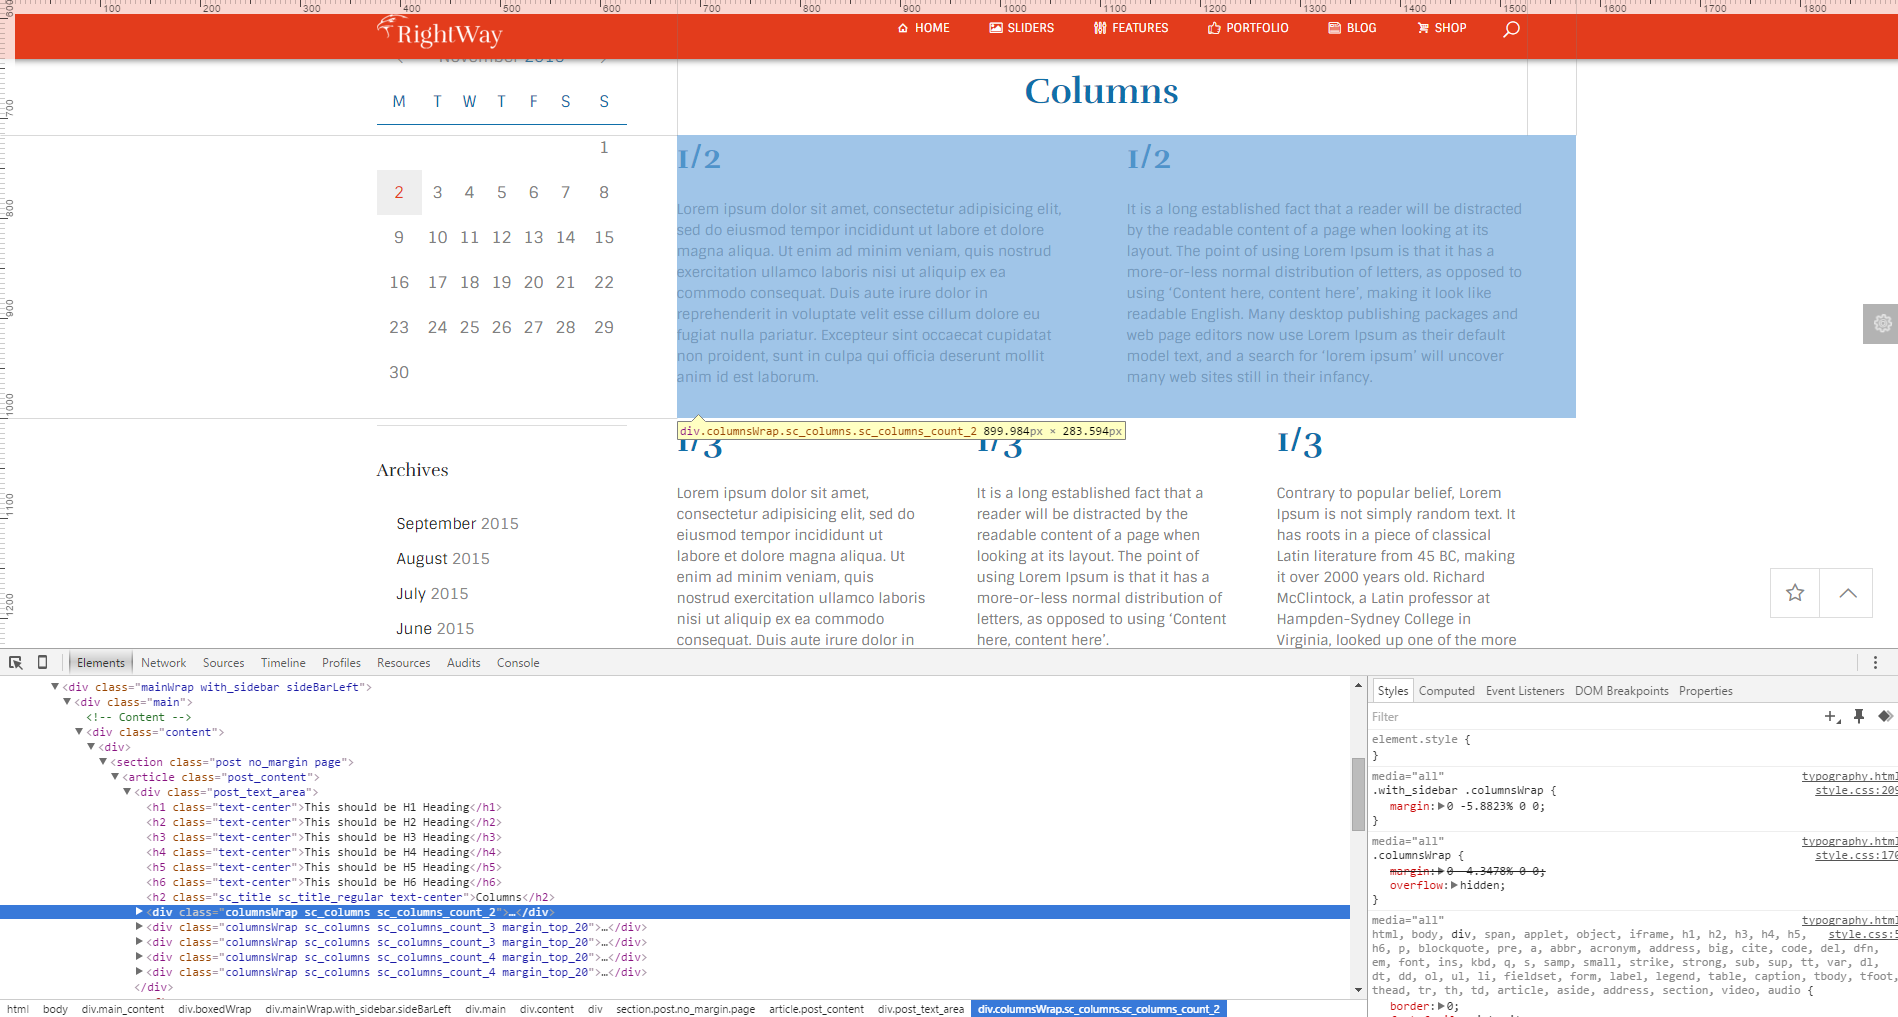
Check the typography.html for more information.
Shortcodes
Below are an examples of a few shortcodes we used in this template.
Skills
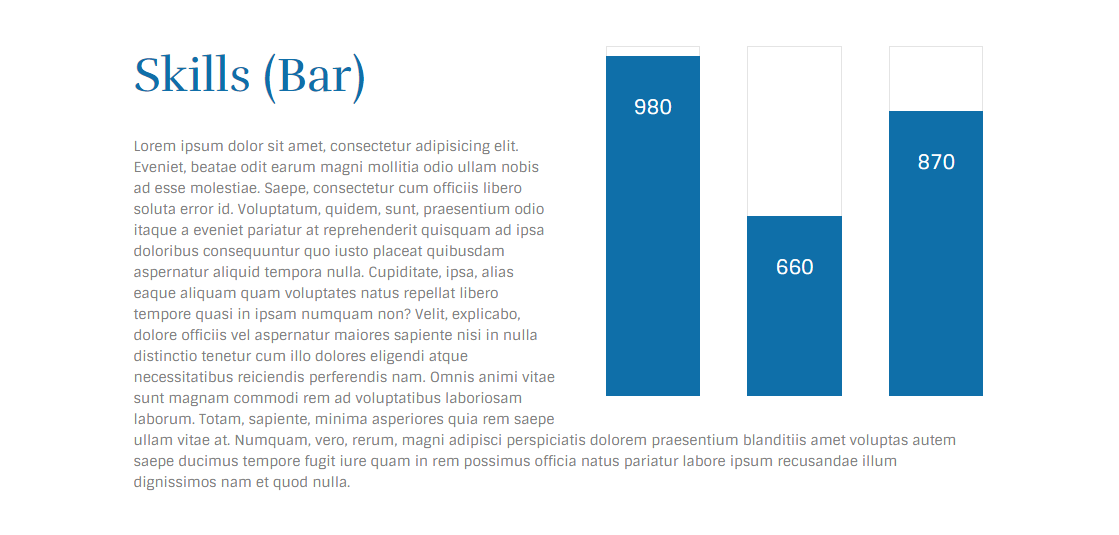
You can customize the skills bar by changing width and data-ed values as well as their styles. Check below screenshot.
<div class="sc_skills_count sc_skills_bg_custom6" style="height: 98%;">
    <div class="sc_skills_total" data-start="0" data-stop="980" data-step="10" data-max="1000" data-speed="12" data-duration="1176" data-ed="">980</div>
</div>
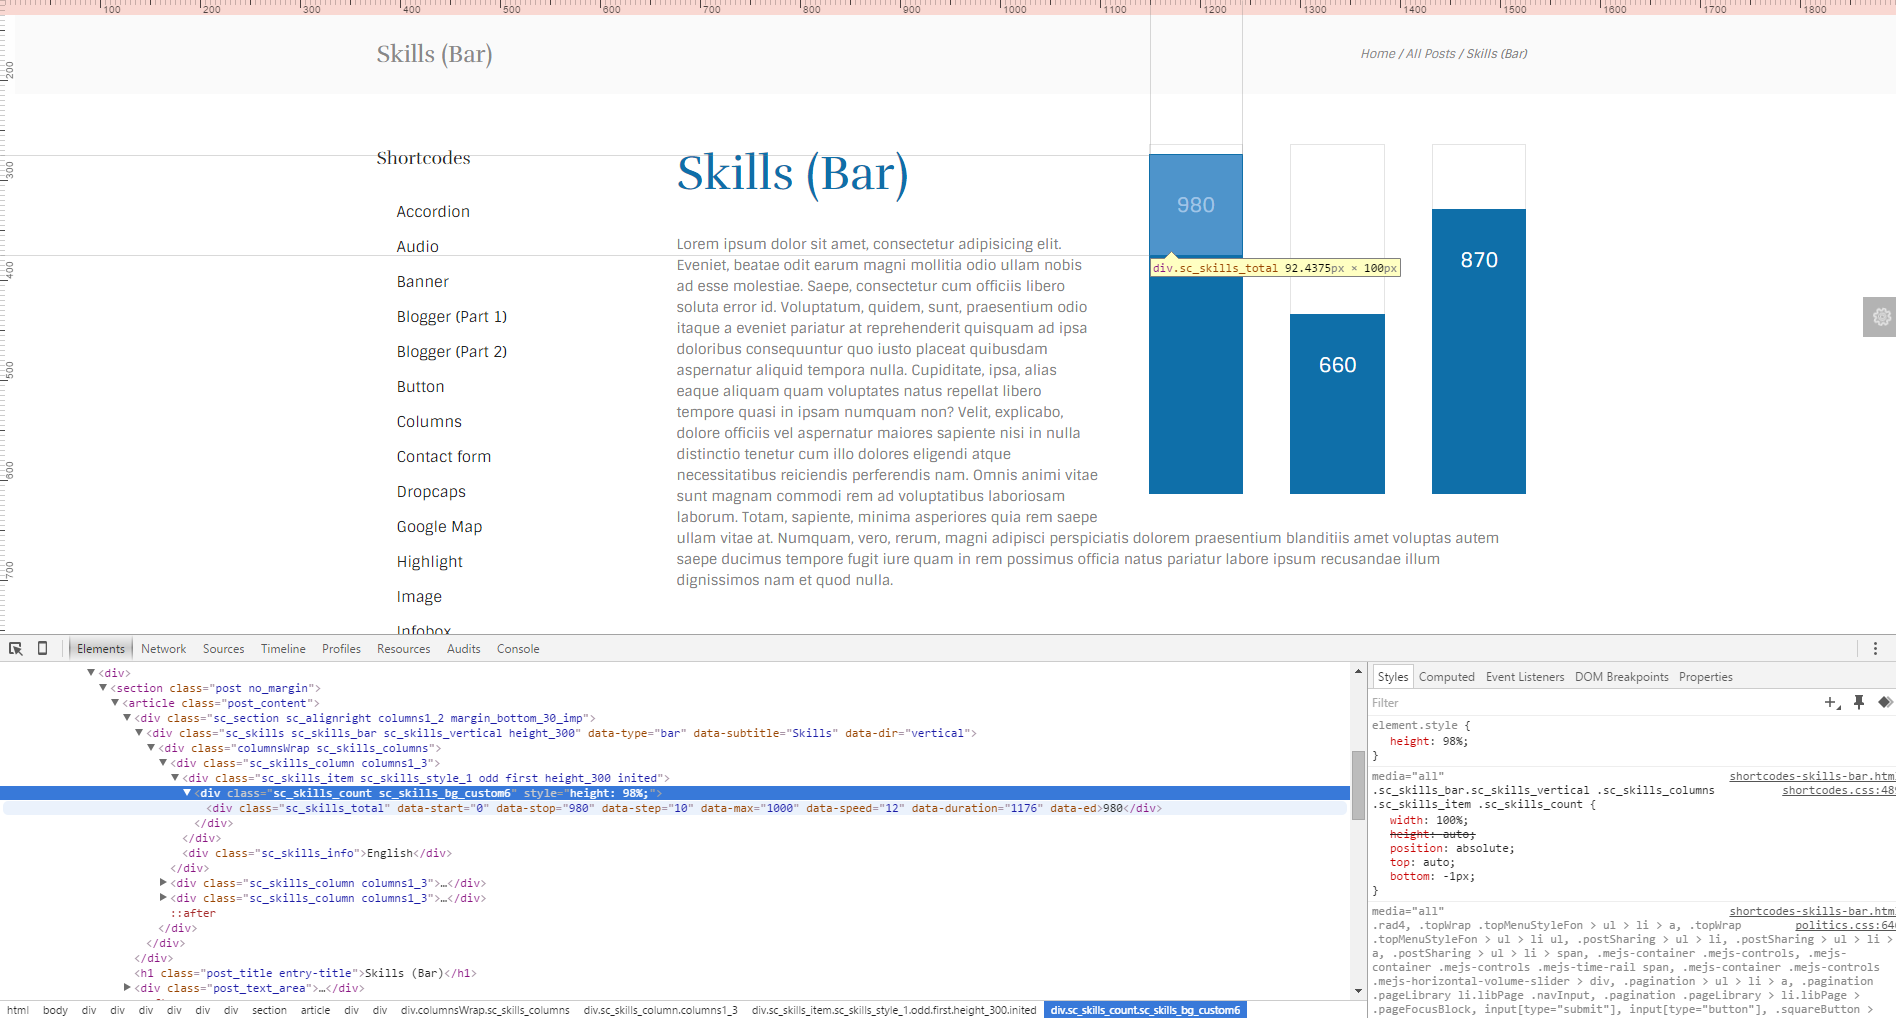
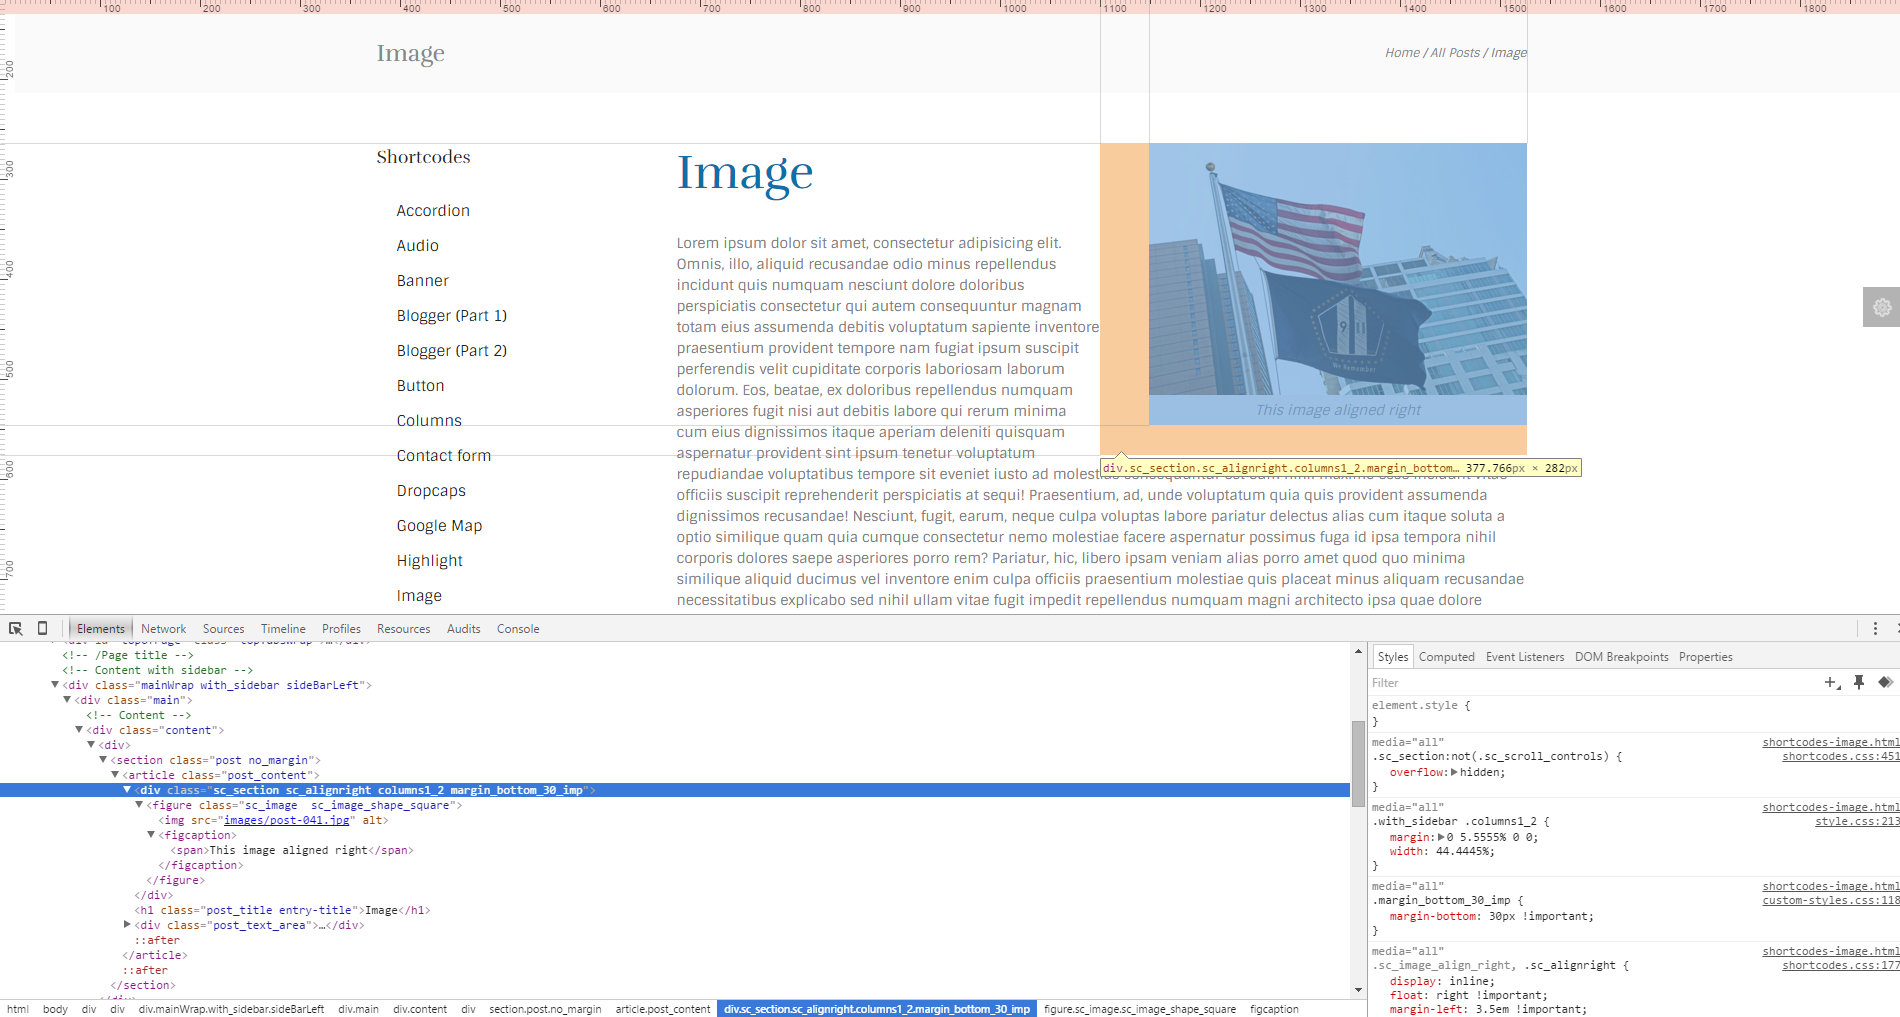
Image Alignment
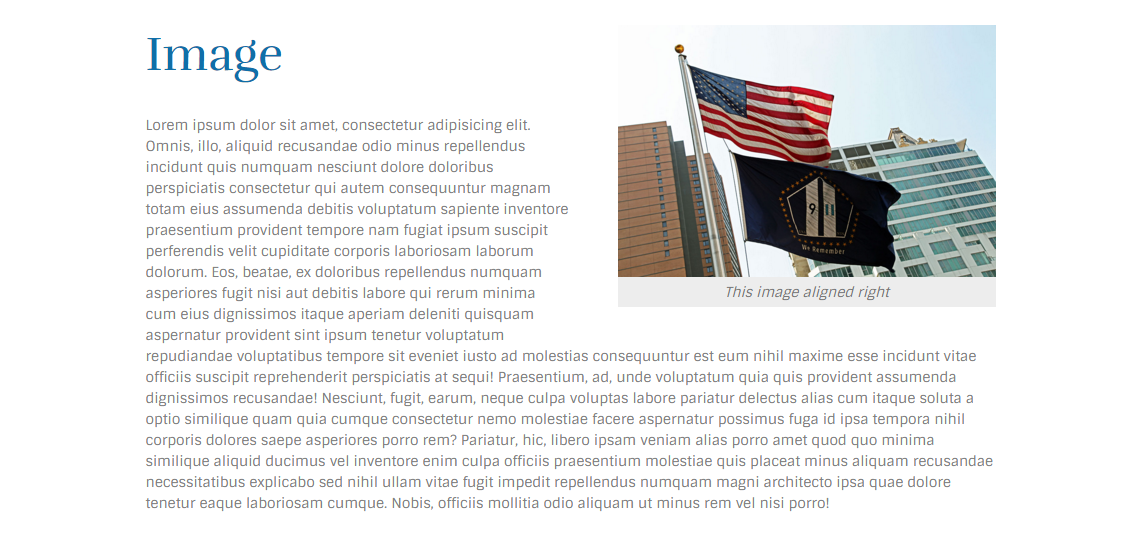
Image alignment can be changed by adding one of the values into the <div class=> tag:
<div class="sc_section sc_alignright columns1_2 margin_bottom_30_imp">
    <figure class="sc_image  sc_image_shape_square">
		<img src="images/post-041.jpg" alt="">
        <figcaption>
			<span>This image aligned right</span>
		</figcaption>
    </figure>
</div>
Highlight

To highlight an element add one of the values below into the <span class=> tag:
<span class="sc_highlight sc_highlight_style_1">dolores voluptatibus id magni impedit quis et</span>

Contact Form
Here is the main Contact Form.

There are several files responsible for contact form functionality:
root directory.../include/sendmail.php
root directory.../include/contact-form.php
root directory.../js/_form_contact.js
Your email address should be specified in the sendmail.php file. See the screenshot below.
$contact_email = '[email protected]';

Google Map
This is how the standard map looks like.

Files responsible for Google map functionality:
root directory.../js/_googlemap_init.js
root directory.../index.html
Address/coordinates should be specified in the root directory.../index.html file.
<div id="sc_googlemap_1" class="sc_googlemap width_100per height_400" data-address="San Francisco, CA 94102, US" data-latlng="" data-zoom="13" data-style="style1" data-title="San Francisco, CA 94102, US" data-description="San Francisco, CA 94102, US" data-point="">

</div>
Additional Plugins
There are several additional plugins that were stylized according to the main color scheme of this template. In this section we will talk about a few of them.
As for the rest, all the necessary files that are responsible for their styles and functionality can be found in the root directory.../js/... and root directory.../css/... folders.
PLEASE NOTE! Full functionality of an additional plugins is not supported/provided as it is just an HTML template.
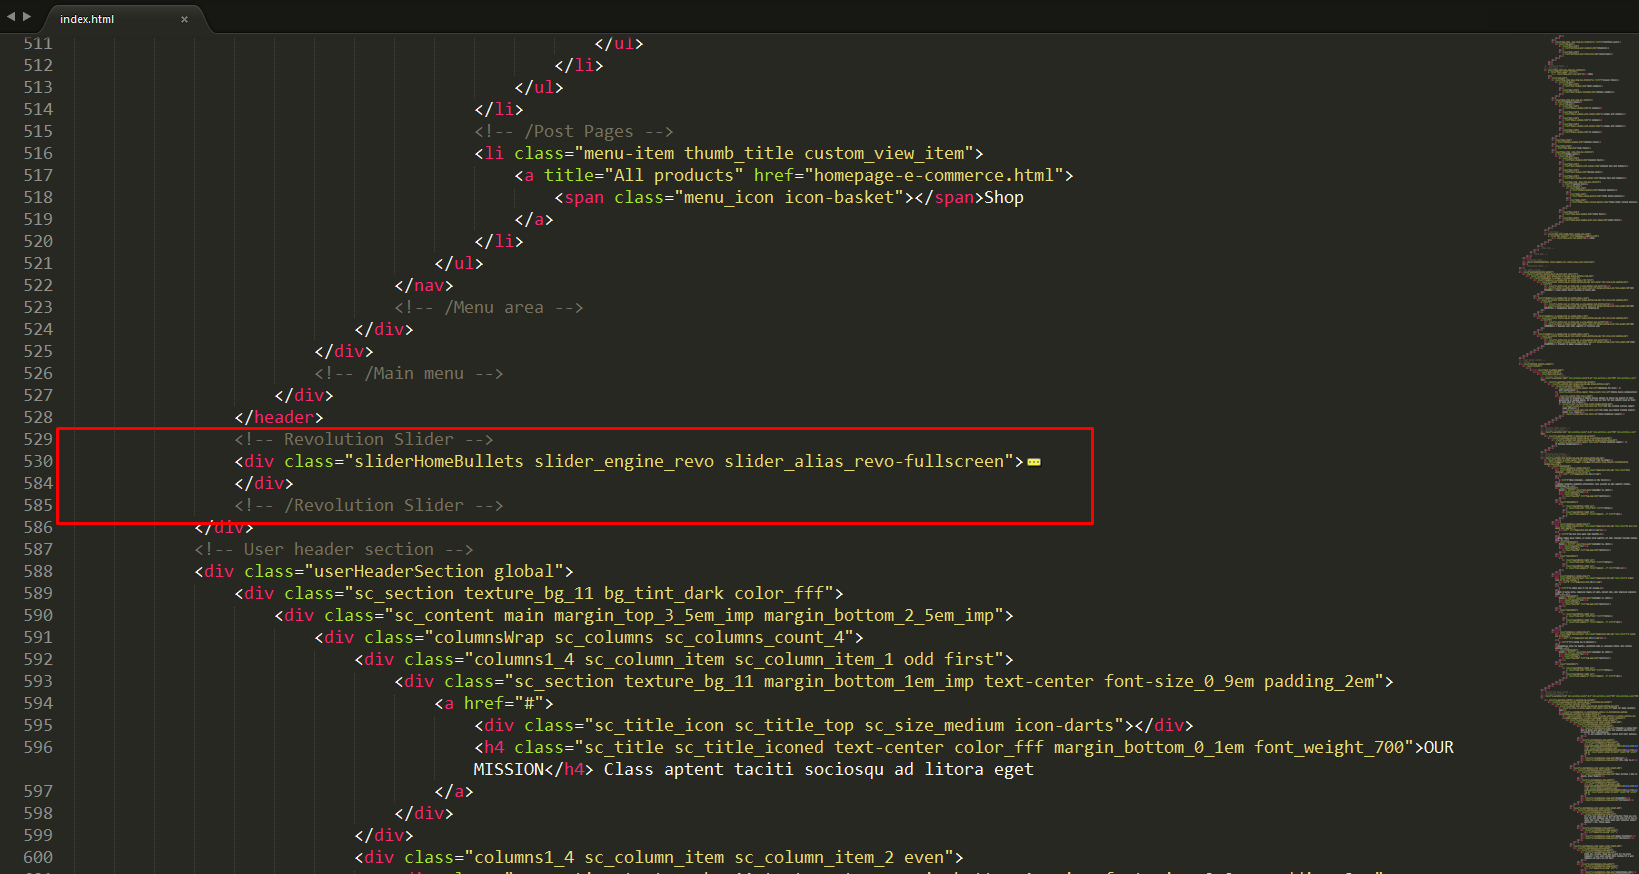
Revolution Slider

Files responsible for the Revolution Slider functionality:
root directory.../js/rs-plugin/...
root directory.../index.html
Check the index.html file for more information. Lines #529-#585.
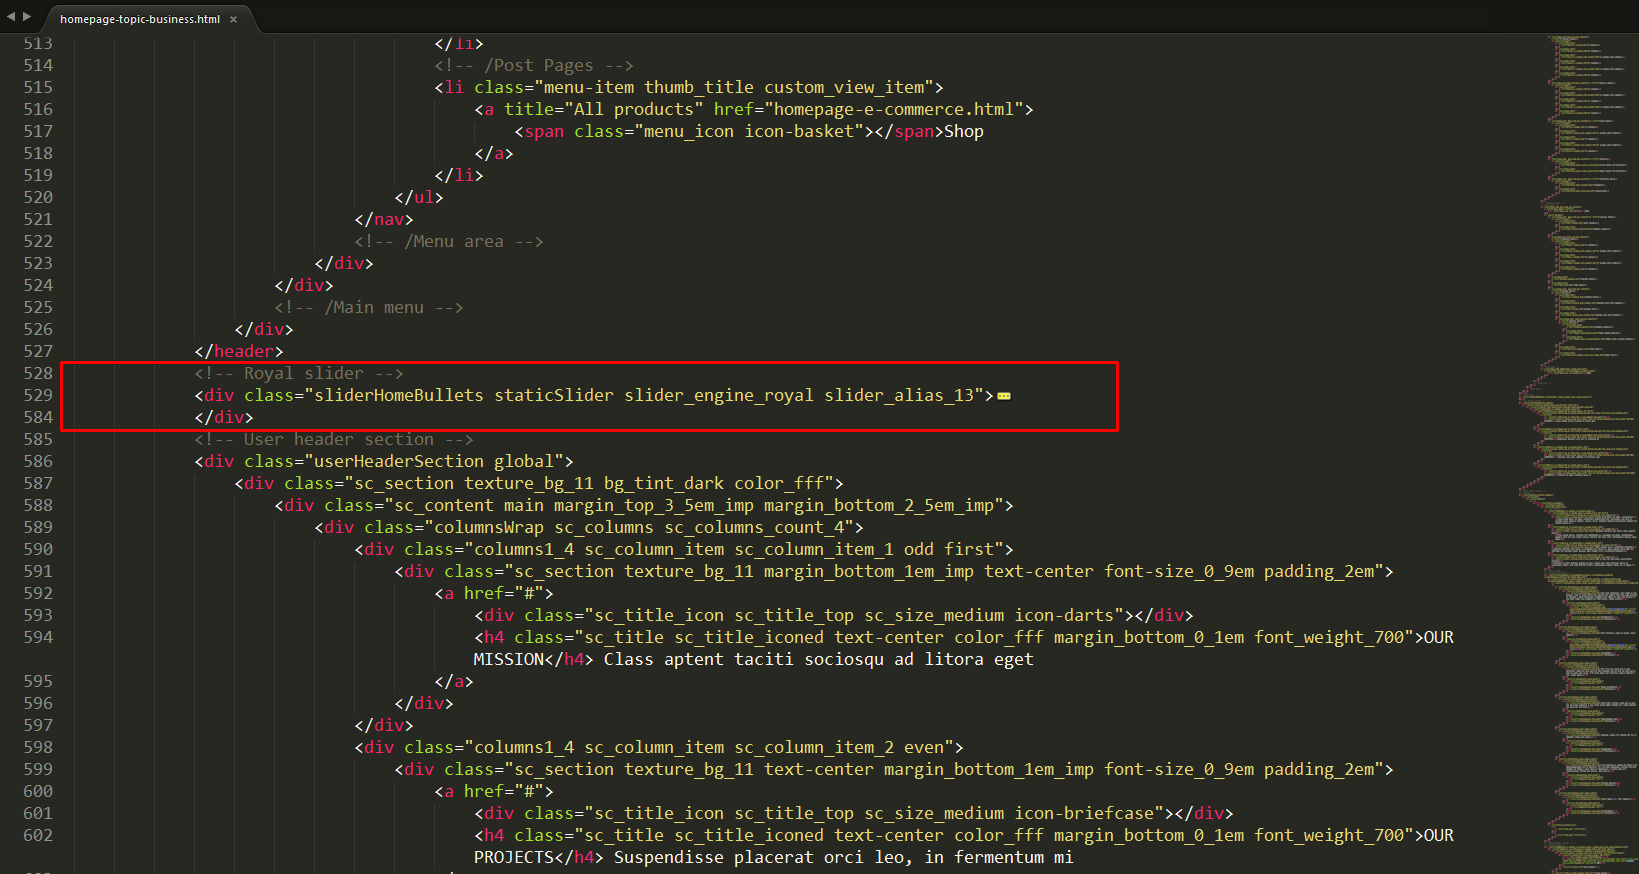
Royal Slider
Files responsible for the Royal Slider functionality:
root directory.../js/royalslider/...
root directory.../homepage-topic-business.html
Check the homepage-topic-business.html file for more information. Lines #528-#584.
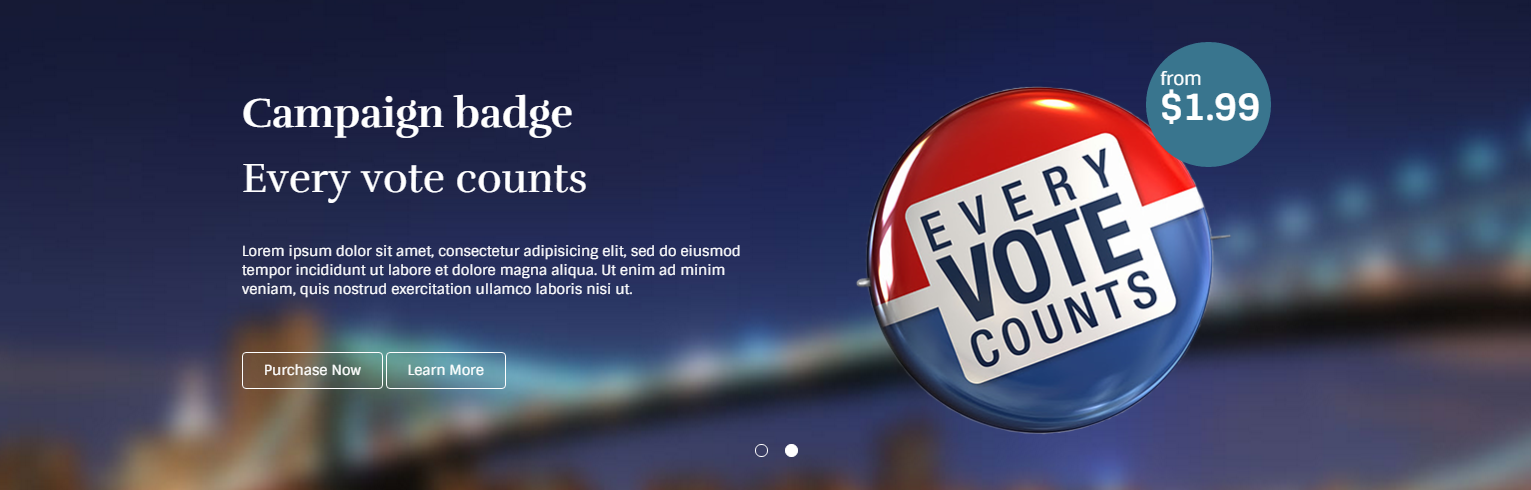
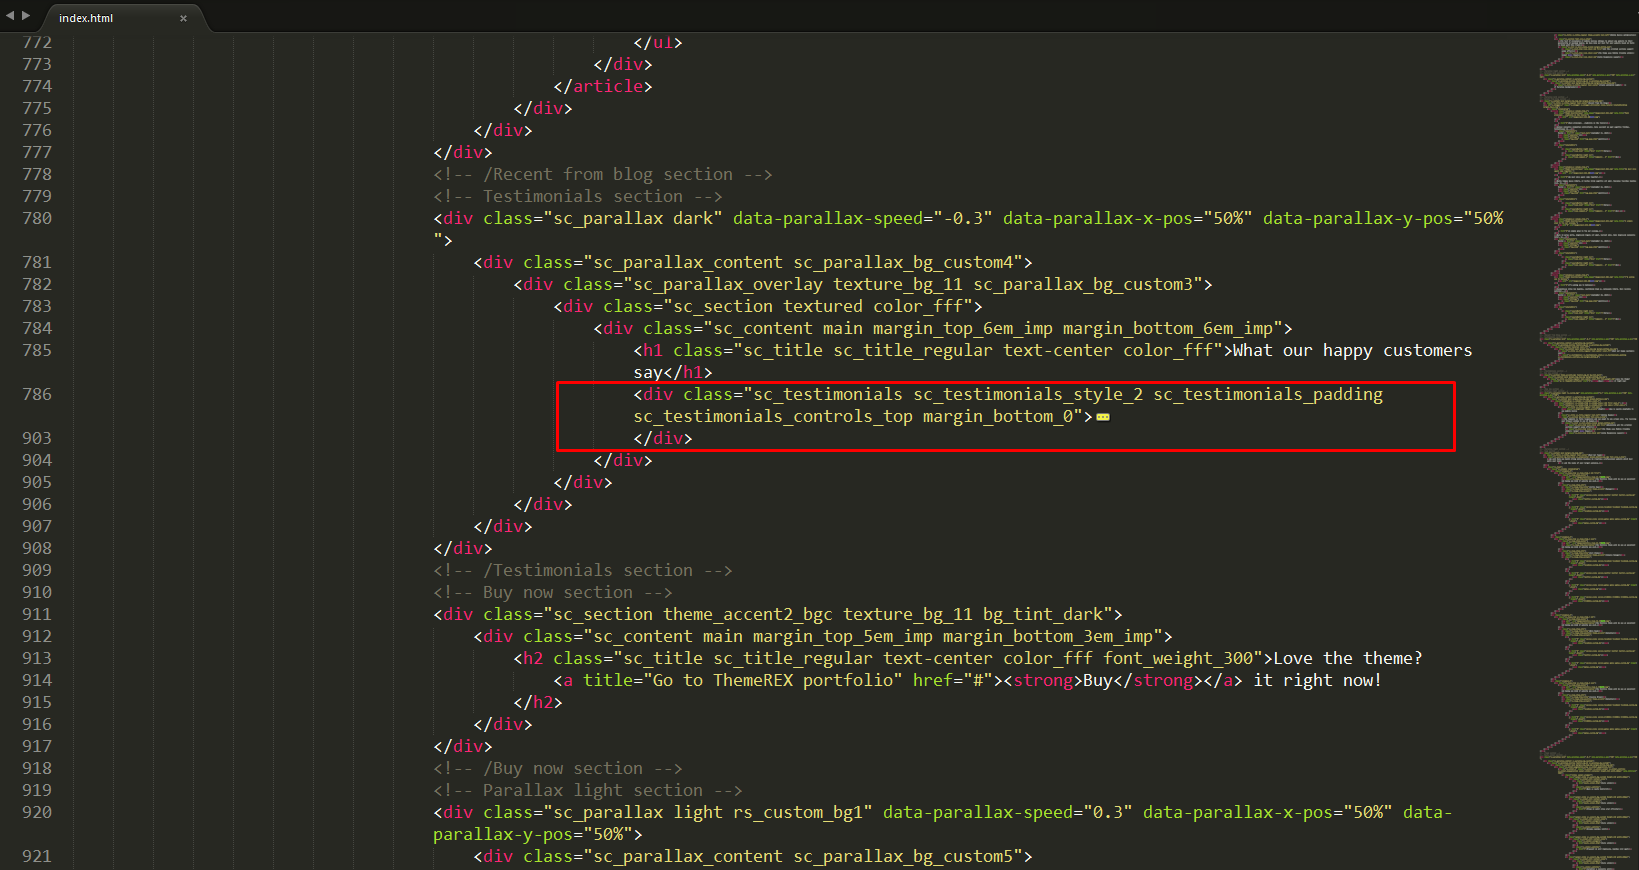
Swiper Slider
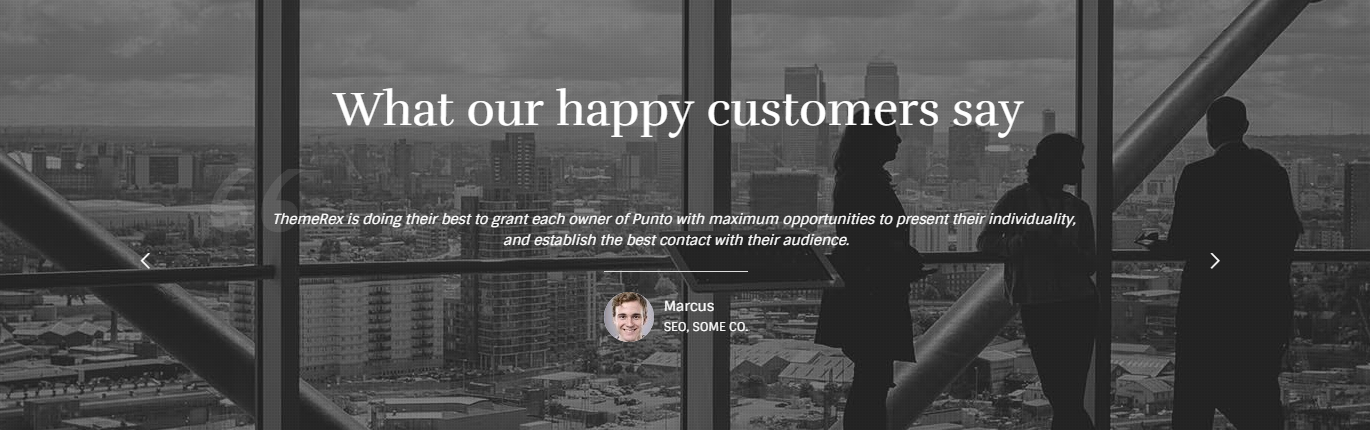
This is how the Swiper Slider looks like.
Files responsible for the Swiper Slider functionality:
root directory.../js/swiper/...
root directory.../index.html
Check the index.html file for more information. Lines #786-#903.
Sources and Credits
In this section you can find an additional information regarding fonts and clipart (.psd files) used in this theme.
-
Fonts:
- Check the
style.cssfile for more information. - Fontello (non standard, icons set). Specified in every
.htmlfile.
- Check the
-
Clipart:
- Images were taken from here.
-
PSD Files:
- All the related .PSD files can be found in the theme's archive. Otherwise you can always request them by contacting our support team.
IMPORTANT! All the images used in this theme are the property of their respective owners and should be purchased separately.
Troubleshooting
We are happy that you are one of our customers and we assure you won't be disappointed. If you come up with any questions that are beyond the scope of this help file, feel free to post them on our support message board at https://themerex.ticksy.com/.
We are open from 10am to 7pm (CET), from Monday till Friday.
PLEASE NOTE!
Our support policy covers getting setup, trouble using any features, and any bug fixes that may arise.
Unfortunately, we cannot provide support for installation, any customizations or 3rd party plugins. You also need to have a valid purchase code to request an assistance from our support team.
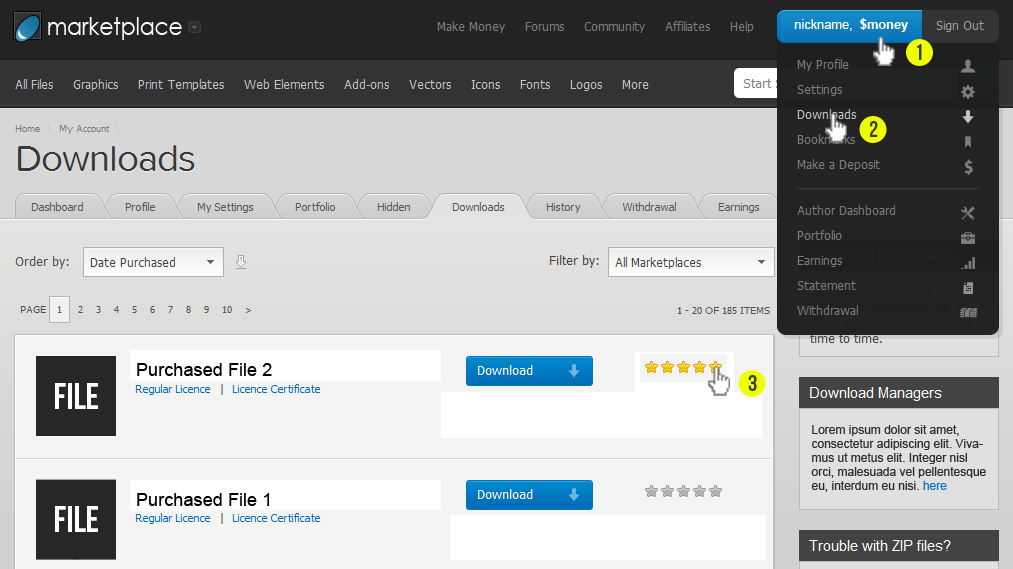
How to find a purchase key (check the screenshot):
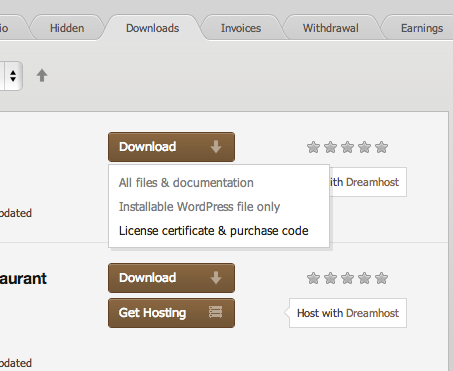
- Log in to your themeForest account.
- Click on the "Downloads" tab.
- Find our theme in the products list.
- Click the "Download" button and select "License certificate & purchase code" in the drop down menu.